BlogScreenshots on your device
How to Take Desktop Screenshots in Go
Capture a full display or region in Go, save it as PNG, and handle multi-monitor coordinates, permissions, Linux backends, and common errors.

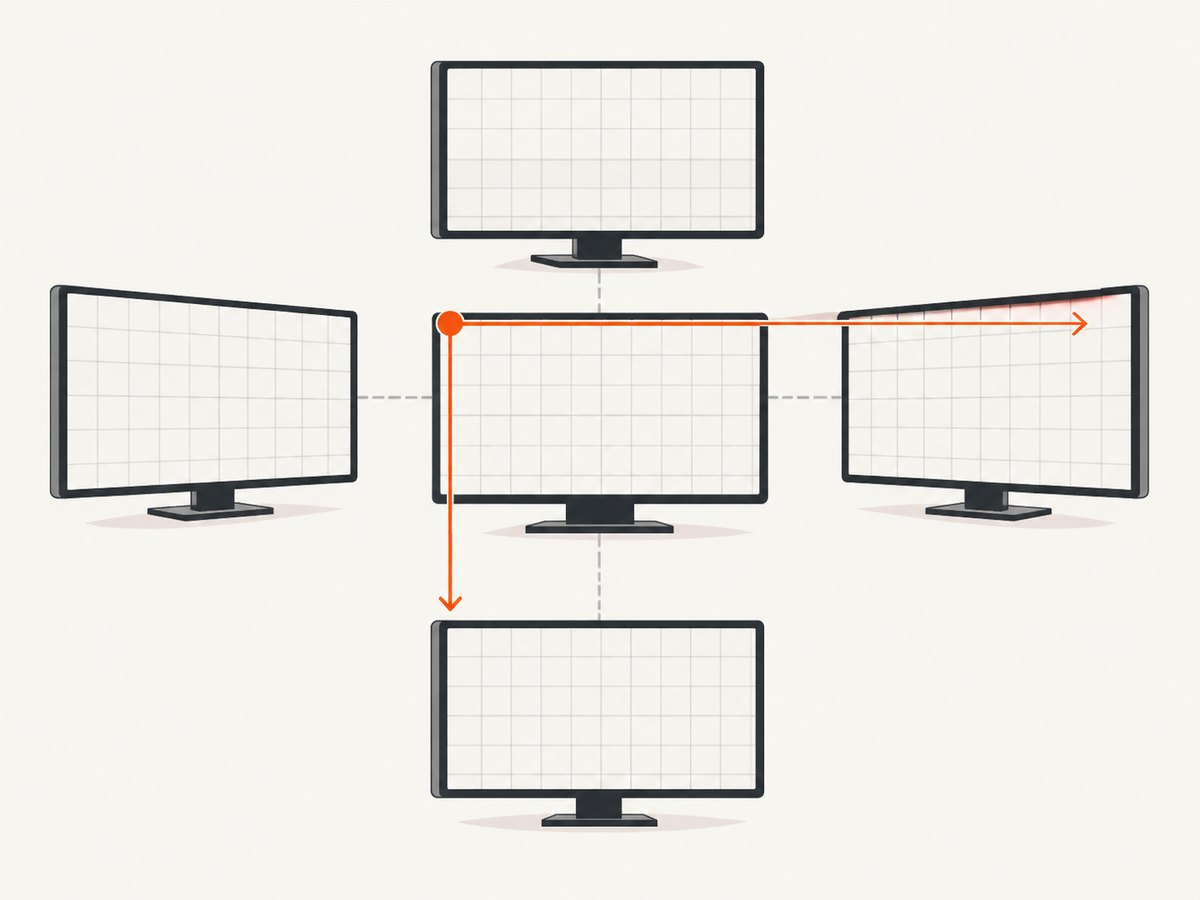
To take a desktop screenshot in Go, use github.com/kbinani/screenshot: enumerate active displays, get a display’s bounds, capture those bounds with CaptureRect, then encode the returned image as PNG. The library also supports capturing an arbitrary rectangle. Its documented coordinate system uses the main display’s upper-left as the origin, so monitors placed above or to the left can have negative coordinates.
This guide captures the local desktop. Capturing a web page running in a browser is a different task: it requires controlling a browser or using a screenshot API. For a browser capture alternative, see ScreenshotNeo.
1. Set up a Go screenshot program
Create a module and add the focused screenshot package:
mkdir desktopshot
cd desktopshot
go mod init example.com/desktopshot
go get github.com/kbinani/screenshot
Save this complete program as main.go. It captures every active display and writes one PNG per display. The filenames include a zero-based display index.
package main

import (
    "fmt"
    "image/png"
    "os"
    "path/filepath"

    "github.com/kbinani/screenshot"
)

func main() {
    count := screenshot.NumActiveDisplays()
    if count == 0 {
        fmt.Fprintln(os.Stderr, "no active displays found")
        os.Exit(1)
    }

    for i := 0; i < count; i++ {
        bounds := screenshot.GetDisplayBounds(i)
        img, err := screenshot.CaptureRect(bounds)
        if err != nil {
            fmt.Fprintf(os.Stderr, "capture display %d (%v): %v\n", i, bounds, err)
            os.Exit(1)
        }

        name := filepath.Join(".", fmt.Sprintf("display-%d.png", i))
        file, err := os.Create(name)
        if err != nil {
            fmt.Fprintf(os.Stderr, "create %s: %v\n", name, err)
            os.Exit(1)
        }
        if err := png.Encode(file, img); err != nil {
            file.Close()
            fmt.Fprintf(os.Stderr, "encode %s: %v\n", name, err)
            os.Exit(1)
        }
        if err := file.Close(); err != nil {
            fmt.Fprintf(os.Stderr, "close %s: %v\n", name, err)
            os.Exit(1)
        }
        fmt.Printf("saved %s (%dx%d)\n", name, bounds.Dx(), bounds.Dy())
    }
}
Run it in the logged-in desktop session where you want the capture:
go run .
# display-0.png, display-1.png, ...
The API workflow follows the project’s README example: NumActiveDisplays, GetDisplayBounds, CaptureRect, and standard-library PNG encoding. Check the upstream README for the current package usage and platform notes.
2. Capture a single display or a region
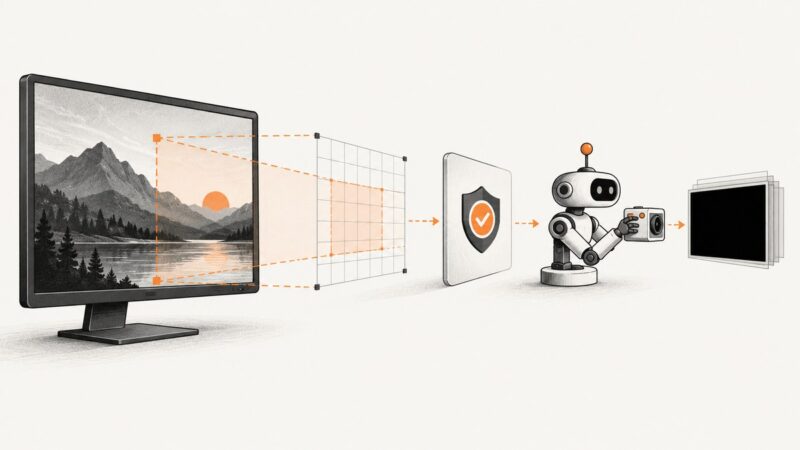
A display is just a rectangle in the desktop’s coordinate space. To capture only the first display, request its bounds instead of looping. To capture a region, pass your own image.Rectangle to CaptureRect. The rectangle uses an inclusive minimum and exclusive maximum, as with Go image rectangles.
package main

import (
    "image"
    "image/png"
    "log"
    "os"

    "github.com/kbinani/screenshot"
)

func main() {
    if screenshot.NumActiveDisplays() == 0 {
        log.Fatal("no active displays")
    }

    // Capture a 900 by 600 area starting at desktop coordinate (100, 100).
    region := image.Rect(100, 100, 1000, 700)
    img, err := screenshot.CaptureRect(region)
    if err != nil {
        log.Fatal(err)
    }

    f, err := os.Create("region.png")
    if err != nil {
        log.Fatal(err)
    }
    if err := png.Encode(f, img); err != nil {
        f.Close()
        log.Fatal(err)
    }
    if err := f.Close(); err != nil {
        log.Fatal(err)
    }
}
Choose a rectangle that lies within the available desktop area. For a region tied to a particular monitor, derive it from that monitor’s bounds rather than assuming the monitor begins at (0, 0):
bounds := screenshot.GetDisplayBounds(0)
region := image.Rect(bounds.Min.X+40, bounds.Min.Y+40,
    bounds.Min.X+940, bounds.Min.Y+640)
img, err := screenshot.CaptureRect(region)
Before capturing, verify that the chosen rectangle fits the target display. For example, check that its minimum is not before bounds.Min and its maximum is not after bounds.Max. This matters for displays with negative positions and for user-selected rectangles near an edge. A capture error should be reported with the requested rectangle so a caller can correct the coordinates.
3. Understand multi-monitor coordinates
The screenshot package documents the origin at the upper-left corner of the main display, with x increasing to the right and y increasing downward. A secondary display to the left may have negative x coordinates; one above the main display may have negative y coordinates. Use the bounds returned by the package as authoritative, and avoid hard-coding a coordinate origin.
To inspect the desktop layout before choosing a target, print each display’s bounds:
for i := 0; i < screenshot.NumActiveDisplays(); i++ {
    b := screenshot.GetDisplayBounds(i)
    fmt.Printf("display %d: min=(%d,%d) max=(%d,%d) size=%dx%d\n",
        i, b.Min.X, b.Min.Y, b.Max.X, b.Max.Y, b.Dx(), b.Dy())
}
Display ordering and arrangement are environment-specific. Re-query bounds when the display setup changes, such as after connecting a monitor, changing resolution, or changing the primary display. If the capture is triggered by a UI selection, translate the selection into the same desktop coordinate space expected by the library.
4. Choose a Go library for the job
For a capture-only utility, the focused package keeps the job narrow. Its README lists Windows, Darwin, Linux, FreeBSD, OpenBSD, and NetBSD targets, supports multiple displays, and describes the implementation as cgo-free except on Darwin. Confirm the current release’s platform details before relying on them in a shipped application.
RobotGo is a broader cross-platform desktop automation library. Its package documentation and upstream README cover capture alongside mouse, keyboard, window, process, image, and bitmap functionality. Its screen example demonstrates full-screen or region capture and saving output. It can fit an application that already needs desktop automation; consider its additional scope, build requirements, and platform backends when capture is the only need.
| Need | Starting point | What to check |
|---|---|---|
| Capture displays or rectangles in a small Go tool | kbinani/screenshot |
OS support, coordinate layout, session permissions |
| Capture as one part of desktop automation | RobotGo | Build setup, backend, compositor and permission support |
| Capture a rendered website, not the local desktop | Browser automation or a screenshot API | Page readiness, cookies, viewport, and output format |
On Linux, desktop session details can determine the available capture path. RobotGo’s documentation describes different behavior for X11, Wayland and compositor-specific or portal approaches; for example, a wlroots-oriented backend depends on protocols such as zwlr_screencopy_v1. Its documentation distinguishes GNOME and KDE setups and describes a portal/libei path with different capture support. These details can vary by release and desktop environment, so consult the current RobotGo documentation for the exact backend, build tags and compositor requirements.
5. Save other image formats
The capture returns an image.Image. PNG is a straightforward lossless choice and is supported by Go’s standard library. For JPEG, choose a quality value from 1 to 100:
import "image/jpeg"

err := jpeg.Encode(file, img, &jpeg.Options{Quality: 85})
For a transparent PNG, whether transparency is useful depends on the capture source; an ordinary desktop capture generally represents the visible screen. Make sure the file extension matches the encoder. If you need WebP, use a Go WebP encoder package and verify its API and platform/build requirements from that package’s own documentation.
For production code that saves repeatedly, centralize file creation, encoding and closing in a helper. Always check encoding and close errors. If capture succeeds but file creation fails, the problem is the destination path or permissions, not the desktop capture itself.
6. macOS and Linux permissions and backends
Permission and backend failures can look like library failures even when the code compiles. RobotGo’s README specifically says macOS screen capture needs Screen Recording permission. Grant access to the actual application or terminal launching the Go process, then restart it if the OS requires that for the permission change to take effect.
On Linux, identify whether the session uses X11 or Wayland, which compositor is active, and which backend the selected library release uses. A program launched as a service, over SSH, or from a container may not share the interactive desktop session. Check the upstream project setup instructions for any build tags, native dependencies, portal support, or compositor protocols required by your environment.
The kbinani/screenshot project lists support for several operating systems, but that does not guarantee access from every headless or sandboxed session. Run a small capture in the same user and session context as the real application before integrating capture into a background worker.
7. Performance, reliability and cost
Desktop capture is local work: the screenshot is acquired from the current display and encoded by the Go process. The practical costs are image memory, encoding time, output storage, and any library/backend setup. Larger screens and multiple displays produce more pixels and larger files. PNG preserves detail but can produce larger files than lossy JPEG; use JPEG when smaller output matters and some compression artifacts are acceptable.
For a responsive application, avoid blocking its UI thread while capturing and encoding. Capture only the display or rectangle needed, avoid repeated full-screen captures when a smaller area works, and close each output file promptly. If you need a live screen feed, clarify the required frame rate and video format: repeatedly writing still screenshots is not itself a video pipeline, and this guide covers one-off still capture.
For reliability, query display count and bounds at capture time, handle permission and backend errors, check every file operation, and include the rectangle and display index in diagnostic messages. Treat monitor rearrangement, lock screens, sleep, remote sessions, and headless operation as environment changes that need validation in the target session. The libraries do not establish a universal speed or frame-rate guarantee, so measure with your own target display and workflow.
There is no per-shot service charge for the local package itself; your costs are the development, runtime environment, storage, and any dependencies you choose. If you are capturing websites instead of your own desktop, a hosted API can avoid maintaining browser processes and their runtime dependencies.
8. Troubleshooting
| Symptom | Likely cause | Fix |
|---|---|---|
| No displays or zero-sized bounds | Process is outside an interactive desktop session, or display setup is unavailable | Run in the logged-in session; inspect display count and bounds there |
| Capture returns an error for a region | Rectangle falls outside the desktop bounds or uses assumed coordinates | Print each display’s bounds and construct the region relative to the target display |
| Black, blank or stale-looking image | Permission denial, unsupported session/backend, locked display, or capture timing | Check OS permission and backend documentation; retry in the intended interactive session |
| macOS capture is blocked | Screen Recording permission is missing for the launching app | Grant permission to the terminal or application that runs the binary; restart if needed |
| Wayland build or capture does not work | Selected backend lacks the compositor protocol or portal support required by that session | Follow the current library’s Wayland setup for the compositor and build tags in use |
| PNG file is empty or missing | Encoder error was ignored, file was not closed, or destination is unwritable | Check create, encode and close errors; confirm directory permissions and path |
| Wrong monitor or clipped region | Display order/layout was assumed or negative coordinates were discarded | Log bounds, preserve signed coordinates, and re-query after layout changes |
9. Capture a website without managing a local browser
If the goal is a screenshot of a URL rather than the machine’s current desktop, ScreenshotNeo provides a website screenshot API and MCP server. Its single GET request returns PNG, JPEG, WebP or PDF. The API parameter names used by other screenshot APIs also work, which can make migration simpler. See the ScreenshotNeo API documentation for request options and setup.

Or skip the browser setup
Use the API key from your ScreenshotNeo account and replace the target URL as needed:
curl -G "https://api.screenshotneo.com/v1/shot" \
  -d access_key=YOUR_API_KEY \
  --data-urlencode url=https://stripe.com \
  -o shot.webp
import requests
r = requests.get(
"https://api.screenshotneo.com/v1/shot",
params={"access_key": "YOUR_API_KEY", "url": "https://stripe.com"},
timeout=90,
)
r.raise_for_status()
open("shot.webp", "wb").write(r.content)const q = new URLSearchParams({
access_key: 'YOUR_API_KEY',
url: 'https://stripe.com'
});
const res = await fetch(`https://api.screenshotneo.com/v1/shot?${q}`);
if (!res.ok) throw new Error(`Screenshot request failed: ${res.status}`);
await Bun.write('shot.webp', res);The Node example uses Bun’s file writer; in Node.js, save the response body with Buffer.from(await res.arrayBuffer()) and fs.writeFile. ScreenshotNeo accepts cookie banners as a visitor and removes more than 60 known consent platforms, newsletter popups and chat widgets before capture; each cleanup step can be turned off. Bot checks or CAPTCHAs, blank pages, timeouts, failed loads and cache hits cost nothing, and response headers report the page verdict and billing state. Its MCP server exposes take_screenshot, get_page_info and capture_pdf for Claude, Cursor and other MCP clients. The Free plan includes 1,000 shots a month with no card; paid plans start at $5 for 3,000 shots.
Sign up free for 1,000 screenshots a month, no card required.
10. FAQ
Can Go capture only one monitor?
Yes. Get its bounds with GetDisplayBounds(index) and pass those bounds to CaptureRect.
Does desktop screenshot capture record video?
No. This workflow saves still images. A live feed needs a capture loop and a video encoding or streaming pipeline designed for the required frame rate.
Do I need a capture card?
No, not to capture the local desktop. A capture card is for acquiring video from external hardware, which is a different input source.
Can I capture a web page with this library?
This package captures the desktop display or a rectangle. To render a URL independently of the current desktop, use browser automation or a website screenshot service such as ScreenshotNeo.