BlogScreenshots on your device
How to Take Screenshots on macOS
Learn every Mac screenshot shortcut, how to capture windows and menus, change save locations, copy to the clipboard, record video, and automate captures.

Direct answer: Press Shift-Command-3 to capture the entire screen, Shift-Command-4 to select an area, or Shift-Command-4 followed by Space to capture a window or menu. Press Shift-Command-5 to open the Screenshot panel, where you can choose still-image or screen-recording modes, set a timer, select a save destination, and control pointer visibility. These are Apple’s documented macOS workflows. Apple’s screenshot instructions and the Mac User Guide cover the same built-in tools.
Choose the shortcut for the thing you want to capture
| What you want | Shortcut | Result |
|---|---|---|
| Entire screen | Shift-Command-3 | Saves a screenshot of every visible display. |
| Rectangular area | Shift-Command-4 | Turns the pointer into crosshairs so you can drag a selection. |
| Window or menu | Shift-Command-4, then Space | Turns the pointer into a camera and captures the item you click. |
| Capture and recording controls | Shift-Command-5 | Opens the Screenshot panel with modes and options. |
| Touch Bar | Shift-Command-6 | Captures the Touch Bar on Macs that have one. |
For routine still images, the three-key shortcuts are fastest. Use the Screenshot panel when you need a timer, a different destination, pointer or click indicators, a recording, or a repeatable configuration.
How to capture the entire screen
- Press and release Shift-Command-3.
- macOS captures all visible screen content.
- By default, the file is saved to the Desktop. A floating thumbnail may appear in the corner; click it to mark up the image, drag it into another document, or wait for it to disappear so the file finishes saving.
If you use more than one display, the shortcut captures the screens according to macOS’s normal multi-display behavior. Check the resulting files on the Desktop and rename or move them as needed.

How to screenshot part of your screen
- Press Shift-Command-4. The pointer becomes crosshairs and displays selection coordinates.
- Drag across the area you need, then release the pointer button or trackpad.
- Press Escape before releasing to cancel.
While dragging, hold Space to move the whole selection without changing its dimensions. This is useful when you have the right crop size but started in the wrong place. If you need a precise crop, watch the coordinate readout while dragging and adjust the edges before releasing.
How to screenshot a window or menu
Capture a window
- Open and arrange the window.
- Press Shift-Command-4, then press Space.
- Move the camera pointer over the window. macOS highlights the target.
- Click to capture it.
Hold Option while clicking if you want to omit the window shadow. This produces a tighter image for documentation or comparison work.
Capture a menu
- Open the menu so its items are visible.
- Press Shift-Command-4, then Space.
- Click the menu with the camera pointer.
If a menu closes before you can select it, open it first and use the shortcut sequence without clicking elsewhere. Press Escape to cancel at any point.
Use the Screenshot panel for options and recording
Press Shift-Command-5, or open Applications > Utilities > Screenshot. The panel offers full-screen, window, and selected-area still captures, plus whole-screen and selected-portion recording modes. Its Options menu controls:
- Save to: Desktop, Documents, Clipboard, Mail, Messages, Preview, or another available destination depending on your macOS version.
- Timer: no delay, 5 seconds, or 10 seconds. A delay gives you time to open a menu or position a pointer.
- Show floating thumbnail: keep the preview for markup and drag-and-drop, or hide it for an immediate save.
- Show mouse pointer: include or exclude the pointer in still captures.
- Show mouse clicks: display click indicators in recordings.
The panel can remember your last area selection. Apple also documents HDR and SDR still-image choices on supported Macs running macOS Tahoe 26 or later; verify your Mac and operating-system version before relying on a particular format. Apple’s user guide describes still screenshots as PNG and recordings as MOV in its general instructions, while newer supported systems can expose additional image-format choices.
Copy a screenshot instead of saving a file
Hold Control with a capture shortcut to send the result to the Clipboard. For example, use Control-Shift-Command-3 for a full-screen capture or Control-Shift-Command-4 for an area. You can then paste directly into an email, issue tracker, presentation, or image editor.
If the floating thumbnail is visible, Control-click it and choose Save to Clipboard. Clipboard captures are convenient for one-time sharing, but they do not create a durable file until you paste or save them elsewhere.
Where screenshots go on a Mac
Keyboard-shortcut screenshots normally save to the Desktop. To change the destination, open Shift-Command-5, choose Options, and select a location under Save to. The setting applies to subsequent Screenshot captures until you change it again.
Use a dedicated folder for a documentation project so your Desktop does not fill with files. macOS filenames generally include the capture date and time; rename files when a stable name matters to a script, design review, or bug report.
How to record your screen
- Press Shift-Command-5.
- Choose the whole-screen recording icon or the selected-portion recording icon.
- Open Options to choose a microphone, timer, save location, and whether clicks appear.
- Start recording.
- Stop with the Stop button in the menu bar, or press Command-Control-Escape.
Apple documents selected-window recording on macOS Tahoe 26 or later. Do not assume that mode exists on earlier releases. For another Apple-supported workflow, open QuickTime Player and choose File > New Screen Recording, or press Control-Command-N. Depending on your Mac, QuickTime may hand the task to Screenshot or show its own recording controls. Choose the workflow that exposes the microphone, timer, pointer, and destination settings you need.
Save, edit, and share a capture
- Markup: click the floating thumbnail, then use the markup tools to draw, add shapes, crop, or add text before saving.
- Drag and drop: drag the thumbnail into a document, chat, or editor.
- Preview: open the saved file in Preview for additional annotations, resizing, or format conversion.
- Clipboard: use Control with the shortcut when you only need to paste once.
For pixel-accurate bug reports, capture the smallest useful area and include the window title or relevant control. For visual regression work, keep the same display scale, browser zoom, and window dimensions between captures.
macOS screenshot edge cases and restrictions
- Protected video: some applications restrict screenshots or recordings. Apple gives Apple TV as an example. A black or empty result can be an application policy rather than a broken shortcut.
- Permissions: screen-recording tools may require approval in System Settings > Privacy & Security > Screen Recording. Follow the prompt for the app you are using.
- Multiple displays: check which display or window is highlighted before capturing. A full-screen capture can include more than the display you intended.
- HDR and format availability: format choices depend on Mac hardware and macOS version. Tahoe 26-era options are not universal.
- Touch Bar: Shift-Command-6 works only on Macs with a Touch Bar.
- Menus that disappear: open the menu first, then invoke the window/menu shortcut. Use a timer from Screenshot if you need more setup time.
Or skip the browser setup
If you need screenshots of web pages rather than your Mac desktop, an API avoids installing a browser automation stack. ScreenshotNeo accepts one GET request and returns a PNG, JPEG, WebP, or PDF. It can load lazy images for full-page captures, capture one element by CSS selector, emulate dark mode or a device preset, set a viewport and retina scale, inject CSS or JavaScript, click an element, wait for a selector, delay, or network idle, and hide selectors before capture. You can also provide headers, cookies, a user agent, Authorization, timezone, geolocation, a transparent background, image resizing, a chosen cache TTL, signed links, asynchronous jobs with signed webhooks, bulk capture for up to 100 URLs per call, and usage data. Every feature is on every plan.
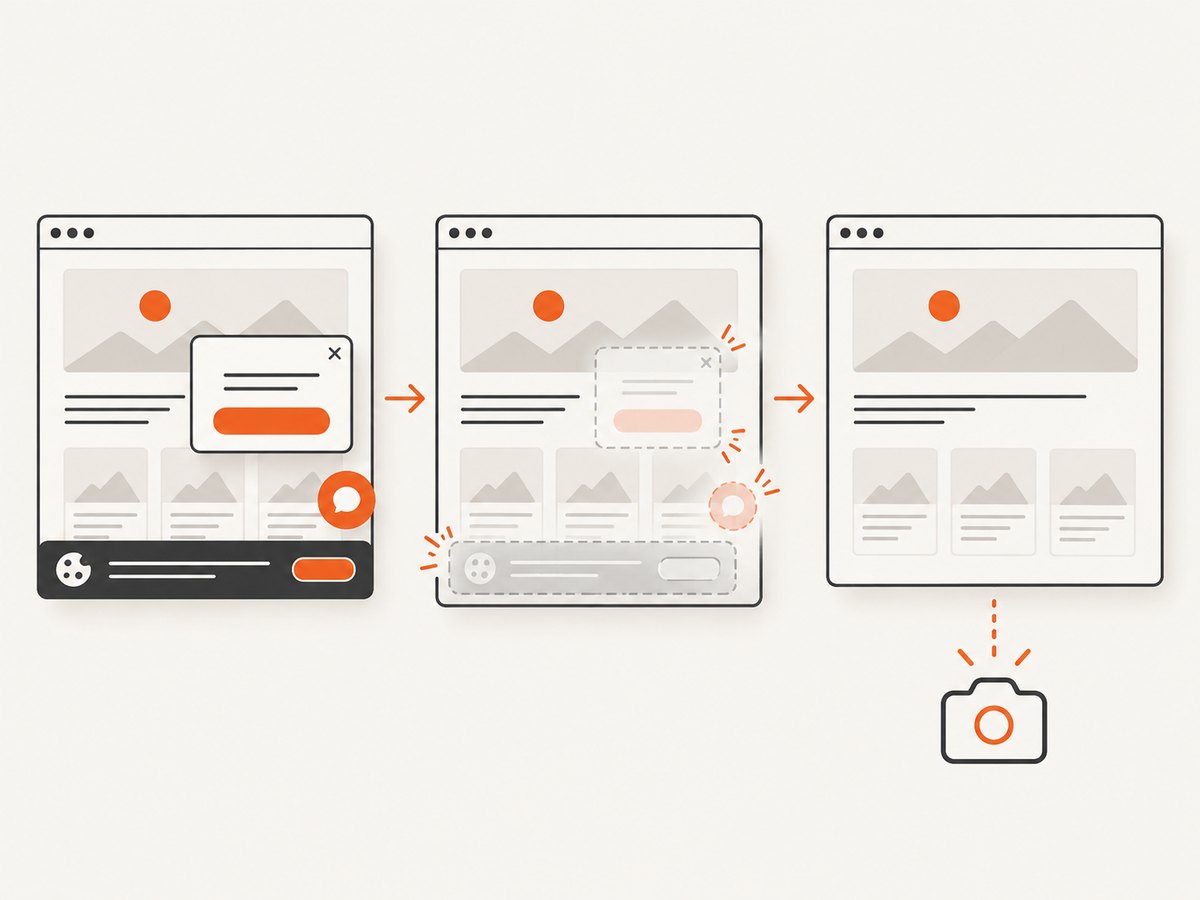
Before capture, ScreenshotNeo accepts cookie and consent banners and removes more than 60 known consent platforms, newsletter popups, and chat widgets; each cleanup step can be turned off. Bot checks or CAPTCHAs, blank pages, timeouts, failed loads, and cache hits are not billed. Response headers identify the page verdict and whether the shot was billed. Its MCP server provides take_screenshot, get_page_info, and capture_pdf tools for Claude, Cursor, and other MCP clients.
See the ScreenshotNeo API documentation for authentication and the full option list.
cURL
curl -G "https://api.screenshotneo.com/v1/shot" \
  -d access_key=YOUR_API_KEY \
  --data-urlencode url=https://stripe.com \
  -o shot.webp
Python
import requests

r = requests.get(
    "https://api.screenshotneo.com/v1/shot",
    params={"access_key": "YOUR_API_KEY", "url": "https://stripe.com"},
    timeout=90,
)
r.raise_for_status()
open("shot.webp", "wb").write(r.content)
Node.js
const q = new URLSearchParams({ access_key: 'YOUR_API_KEY', url: 'https://stripe.com' });
const res = await fetch(`https://api.screenshotneo.com/v1/shot?${q}`);
if (!res.ok) throw new Error(`Screenshot failed: ${res.status}`);
const fs = await import('node:fs/promises');
await fs.writeFile('shot.webp', Buffer.from(await res.arrayBuffer()));
Free accounts include 1,000 shots per month with no card. Paid plans start at $5 for 3,000 shots; higher plans are $15 for 15,000, $39 for 60,000, $99 for 250,000, and $249 for 1,000,000, with two months free on yearly billing. Create a free ScreenshotNeo account and start with the no-card allowance.
Troubleshooting checklist
| Symptom | Likely cause | Fix |
|---|---|---|
| Nothing appears after the shortcut | The shortcut was pressed incorrectly or a custom binding replaced it. | Try Shift-Command-5, then check System Settings > Keyboard > Keyboard Shortcuts > Screenshots. |
| Capture is saved somewhere unexpected | Screenshot’s destination was changed. | Open the panel, choose Options > Save to, and select Desktop or a project folder. |
| Window shadow is unwanted | Window capture includes macOS decoration. | Hold Option while clicking the highlighted window. |
| Recording has no microphone | No input was selected or permission is missing. | Choose a microphone in Options and allow access in Privacy & Security. |
| Video window is black | The application protects its content. | Check the app’s policy; Apple TV is a documented example of restricted content. |
| ScreenshotNeo returns an error | Invalid key, URL, or an unreachable page. | Check the access key, URL encoding, network response, and the API documentation. Inspect X-Page-Verdict and X-Billed headers. |
Performance, reliability, and cost notes
For local captures, shortcuts are effectively immediate because macOS captures what is already rendered. Recordings consume storage and processing while they run, so choose a short timer and a sensible save location. Consistent browser zoom, display scaling, and window geometry matter more than shortcut choice when comparing screenshots.
For automated web captures, wait for the page state you actually need: a selector for a specific component, network idle for a mostly settled page, or a fixed delay for an animation. Full-page pages with lazy images may take longer than a viewport capture. Use caching with a TTL when repeated identical URLs are acceptable, and asynchronous jobs with signed webhooks for large batches. ScreenshotNeo’s bulk endpoint accepts up to 100 URLs per call. Failed loads, blank pages, bot checks, CAPTCHAs, timeouts, and cache hits are not billed, which makes retries easier to budget; still add bounded retries and log verdict and billing headers in production.
FAQ
How do I take a screenshot on my Mac?
Use Shift-Command-3 for the full screen, Shift-Command-4 for an area, or Shift-Command-4 then Space for a window or menu.
How do I screenshot part of my screen on a Mac?
Press Shift-Command-4, drag over the region, and release. Press Escape to cancel.
How do I screenshot a window on a Mac?
Press Shift-Command-4, press Space, then click the highlighted window. Hold Option to omit its shadow.
Where do screenshots go on Mac?
They go to the Desktop by default. Change the folder from Shift-Command-5 > Options > Save to.
How do I copy a screenshot to the clipboard on Mac?
Hold Control with the shortcut, such as Control-Shift-Command-3, or Control-click the floating thumbnail and choose Save to Clipboard.
How do I record my screen on Mac?
Press Shift-Command-5, choose a recording mode, configure Options, and stop with the menu-bar Stop button or Command-Control-Escape.