BlogScreenshots on your device
Mac Screenshot Keyboard Shortcuts: How to Capture Your Screen
Use Mac screenshot shortcuts to capture the whole screen, a region, a window, or a recording—and control where each capture goes.
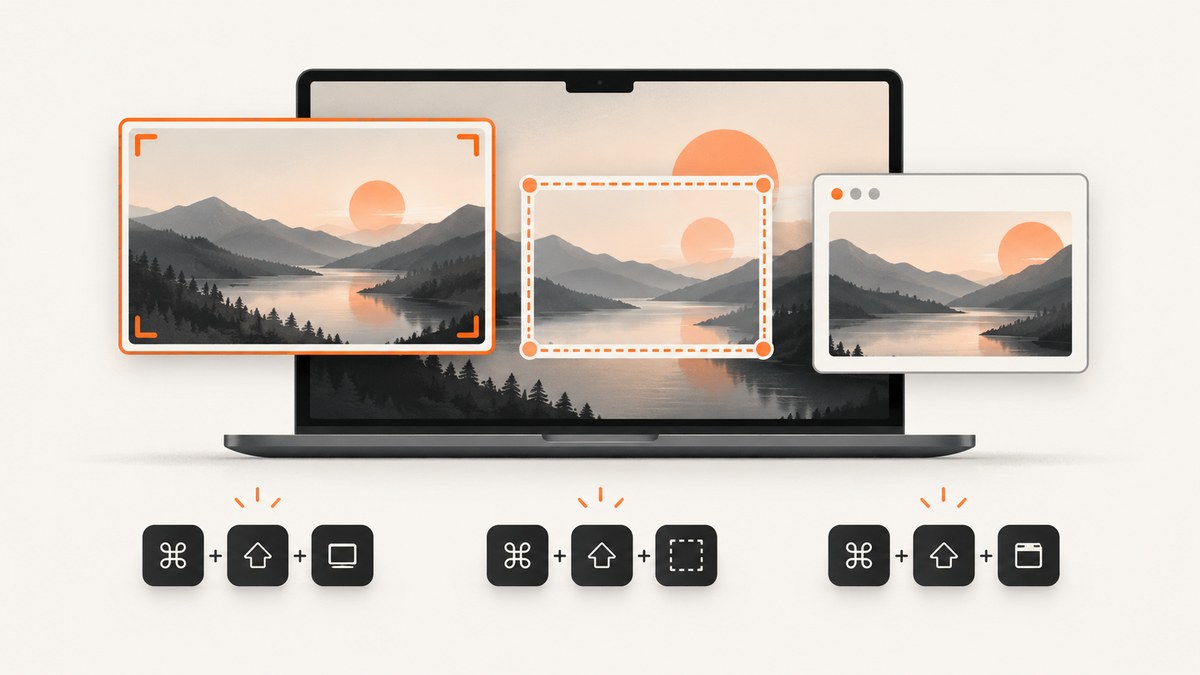
Quick answer: press Shift–Command–3 for the entire screen, Shift–Command–4 for a selected area, or Shift–Command–4 and then Space for a window or menu. Press Shift–Command–5 to open the Screenshot controls for captures, recordings, timers, and save options.
These instructions follow Apple’s current Mac guidance. Names, available formats, and some controls can vary by macOS version and Mac hardware. See Apple’s Take a screenshot on Mac and Take screenshots or screen recordings on Mac.
Mac screenshot shortcuts at a glance
| What you need | Shortcut | What happens |
|---|---|---|
| Entire screen | Shift–Command–3 | Captures every visible display. |
| Selected area | Shift–Command–4 | Turns the pointer into a crosshair so you can drag a rectangle. |
| Window or menu | Shift–Command–4, then Space | Turns the pointer into a camera; click the highlighted window or menu. |
| Screenshot controls or recording | Shift–Command–5 | Opens the Screenshot toolbar. |
| Touch Bar | Shift–Command–6 | Captures the Touch Bar on supported Macs. |
How do I take a screenshot of the whole Mac screen?
- Press and release Shift–Command–3.
- If a floating thumbnail appears, click it to mark up or edit the image, or wait for macOS to save it.
- Find the saved file in the current screenshot destination, which is normally the desktop.
With a second display connected, the shortcut captures the displays according to macOS’s screenshot behavior. If you need only one window or a smaller region, use the shortcuts below.

How do I screenshot part of the screen?
- Press Shift–Command–4. The pointer becomes a crosshair.
- Drag across the area you want.
- Release the mouse or trackpad to capture it.
- Press Escape before releasing to cancel.
- Hold Space while dragging to move the selected rectangle without changing its size.
This is useful for cropping out a sidebar, selecting a dialog, or capturing only one part of a web page.
How do I screenshot a window or menu?
Capture a window
- Bring the target window to the front.
- Press Shift–Command–4, then press and release Space.
- Move the camera pointer over the window and click.
Hold Option while clicking if you want to leave out the window’s shadow. Press Escape to cancel.
Capture a menu
- Open the menu.
- Press Shift–Command–4, then Space.
- Click the highlighted menu.
For a partial menu capture, open the menu and use Shift–Command–4 to drag across the menu items you want.
How do I copy a screenshot instead of saving a file?
Hold Control while using the capture shortcut. For example, Control–Shift–Command–3 copies the full-screen capture to the clipboard. You can then paste it into an email, document, chat, or image editor.
If the floating thumbnail is visible, Control-click it and choose Save to Clipboard.
What does Shift-Command-5 do?
On macOS Mojave 10.14 and later, Shift–Command–5 opens the Screenshot toolbar. It provides buttons for:
- Capturing the entire screen
- Capturing a selected window
- Capturing a selected portion
- Recording the entire screen
- Recording a selected portion
Open Options to set a timer, choose a save destination, show or hide the pointer, and control whether the floating thumbnail appears. Recording options can include a microphone choice; recording controls are separate from still-image options.
Where do Mac screenshots go?
By default, screenshots are saved to the desktop. To change this:
- Press Shift–Command–5.
- Choose Options.
- Select a destination such as Desktop, Documents, Clipboard, Mail, Messages, or another location offered by your macOS version.
You can click the floating thumbnail to edit it or drag it to another location before it disappears.
How do I record my Mac screen?
- Press Shift–Command–5.
- Choose Record Entire Screen or Record Selected Portion.
- Use Options to select recording settings, including a microphone when available.
- Start recording, then use the stop control in the menu bar when finished.
Apple’s user guide lists screenshots as PNG files and screen recordings as MOV files. On supported Mac models running macOS Tahoe 26 or later, Apple describes an SDR (Most Compatible) PNG choice and an HDR HEIF choice. That format choice is not available on every Mac.
Shortcut details that save time
| Need | Best method |
|---|---|
| Fast full-screen image | Shift–Command–3 |
| Exact rectangle | Shift–Command–4, then drag |
| Clean window image | Shift–Command–4, Space, click; hold Option to omit the shadow |
| Paste directly into another app | Add Control to the shortcut |
| Delay capture or change destination | Shift–Command–5 and Options |
| Capture a Touch Bar | Shift–Command–6, when supported |
Change or restore Mac screenshot shortcuts
Open System Settings and go to Keyboard > Keyboard Shortcuts > Screenshots. There you can inspect, enable, disable, or customize the screenshot shortcuts. The exact settings layout can differ by macOS release.

Common problems and fixes
The shortcut does nothing
Check that the screenshot shortcut is enabled in System Settings > Keyboard > Keyboard Shortcuts > Screenshots. Another app or a custom keyboard mapping may also be using the same keys.
The capture includes the wrong area
Press Escape and start again. For a fixed rectangle, hold Space while dragging to reposition it without resizing.
The screenshot is not on the desktop
Open Shift–Command–5 and check Options. A previous destination change may have sent captures to Documents, Clipboard, or another folder.
The window shadow is visible
Use window capture and hold Option while clicking the window.
I need to paste the image, but no file was created
Add Control to the shortcut or use the floating thumbnail’s Control-click menu and choose Save to Clipboard.
A protected app will not capture
Some apps may block screenshots of their windows. Apple gives Apple TV as an example. This is an app restriction, not necessarily a shortcut failure.
The recording has no microphone audio
Open Shift–Command–5, choose Options, and select the microphone when that option is available. Recording settings and still-image settings are separate.
Performance, reliability, and file considerations
- Keyboard shortcuts are local, so they do not depend on an internet connection or an external service.
- Large full-screen captures and recordings consume more storage than small region captures. Check the selected destination when disk space is limited.
- Use window or region capture when you need a smaller image to share or upload.
- For repeatable documentation, keep the same display scaling, window size, and destination so captures remain consistent.
- Protected windows, permission settings, and macOS version differences can affect what is capturable.
Or skip the browser setup
If you need screenshots of web pages from code, ScreenshotNeo provides a website screenshot API and MCP server. One GET request returns a PNG, JPEG, WebP, or PDF. Before capture it accepts cookie or consent banners like a visitor and removes more than 60 known consent platforms, newsletter popups, and chat widgets; each step can be turned off. Bot checks or CAPTCHAs, blank pages, timeouts, failed loads, and cache hits cost nothing, and the response identifies the result with X-Page-Verdict and X-Billed headers. Its MCP server provides take_screenshot, get_page_info, and capture_pdf tools for Claude, Cursor, and other MCP clients.
See the ScreenshotNeo API documentation for all options.
cURL
curl -G "https://api.screenshotneo.com/v1/shot" -d access_key=YOUR_API_KEY --data-urlencode url=https://stripe.com -o shot.webpPython
import requests

r = requests.get(
    "https://api.screenshotneo.com/v1/shot",
    params={"access_key": "YOUR_API_KEY", "url": "https://stripe.com"},
    timeout=90,
)
r.raise_for_status()
open("shot.webp", "wb").write(r.content)
Node.js
const q = new URLSearchParams({ access_key: 'YOUR_API_KEY', url: 'https://stripe.com' });
const res = await fetch(`https://api.screenshotneo.com/v1/shot?${q}`);
if (!res.ok) throw new Error(`Screenshot failed: ${res.status}`);
const fs = await import('node:fs/promises');
await fs.writeFile('shot.webp', Buffer.from(await res.arrayBuffer()));
ScreenshotNeo includes full-page capture with lazy images, element selectors, device presets, custom viewports, retina scale, dark mode, PDFs, custom CSS and JavaScript, clicks, waits, request blocking, headers, cookies, user agents, authorization, timezone, geolocation, transparent backgrounds, resizing, caching, signed links, asynchronous jobs, webhooks, bulk capture, usage data, and an OpenAPI specification. The parameter names used by other screenshot APIs also work, which can simplify migration.
Plans include 1,000 free shots each month with no card. Paid plans start at $5 for 3,000 shots; yearly billing gives two months free, and every feature is available on every plan. Create a free ScreenshotNeo account.
FAQ
What is the fastest Mac screenshot shortcut?
Use Shift–Command–3 for the entire screen or Shift–Command–4 for a selected area.
Can I screenshot only one application window?
Yes. Press Shift–Command–4, press Space, then click the highlighted window.
Can I capture a screenshot directly to the clipboard?
Yes. Hold Control while using the screenshot shortcut.
Are Mac screenshots always PNG files?
Apple lists screenshots as PNG. Supported Macs on macOS Tahoe 26 or later may also offer HDR HEIF; availability depends on hardware and software.
How do I capture a web page without manually arranging a browser?
Use the ScreenshotNeo API or its MCP server when you need repeatable, automated web captures.


