Node.js Best Practices for Building Reliable Applications
Build reliable Node.js services by choosing a supported runtime, keeping request work bounded, hardening HTTP handling, and making failures diagnosable.
Reliable Node.js applications start with a supported runtime, bounded work on request paths, deliberate HTTP limits, and operational evidence that helps you diagnose failures. Node.js is especially well suited to I/O-bound services; CPU-heavy work needs separate measurement and may need partitioning, a worker pool, or another runtime. The right architecture depends on your workload, dependencies, and deployment environment.
At the time of writing, the official release schedule lists Node.js 24 and 22 as LTS and 26 as Current. Production guidance is to use an Active LTS or Maintenance LTS release; check the live schedule before choosing a version because release labels change. Node.js release schedule
1. Choose and maintain a supported runtime
Start with a supported Node.js major line and keep its patch releases current. The project says LTS typically guarantees critical bug fixes for 30 months. End-of-life versions no longer receive project updates, including security fixes. Verify status against the release schedule and end-of-life page when planning deployments.
- Pin the supported major version in local development, CI, containers, and production so environments do not silently diverge.
- Upgrade dependencies and the runtime together in a branch; run compatibility, integration, and load checks that match your service.
- Keep a rollback path for runtime upgrades, and record the runtime version in deploy metadata and diagnostic logs.
- If a service must temporarily remain on an end-of-life version, treat paid extended support as a bridge while planning migration, not as a permanent substitute for a supported release.
Do not choose a version solely because it is newest. Compare support status, dependency compatibility, security update eligibility, and the cost of migration.
2. Keep request work bounded
Node.js can serve many clients with a small number of threads. A long synchronous callback prevents the event loop from handling other work; slow tasks in the worker pool can also reduce capacity. The practical rule is to limit how much work any request can cause and measure where the time goes. The official guidance explains the distinction in Don’t Block the Event Loop (or the Worker Pool).
Bound input and computation
- Set request body and upload size limits before parsing. Reject oversized input early.
- Validate array lengths, nesting depth, string lengths, and query complexity before expensive processing.
- Review regular expressions and JSON parsing on attacker-controlled data; large or pathological inputs can consume disproportionate CPU or memory.
- Paginate large reads, cap batch sizes, and avoid constructing huge response objects in one callback.
- Check third-party modules for synchronous work on hot paths. A library can honor its API contract and still block the event loop or worker pool.
Choose the concurrency tool for the task
| Workload | Starting approach | Watch for |
|---|---|---|
| Waiting on network, disk, or a database | Use asynchronous APIs and control concurrency to protect downstream services. | Unbounded fan-out, queue growth, and retry storms. |
| Short CPU work | Keep it bounded and measure its impact on event-loop delay and tail latency. | A small average can hide expensive outliers. |
| Substantial CPU work | Partition it, use an appropriately sized worker pool, or move it to a dedicated service when contention justifies the added complexity. | Scheduling, serialization, communication overhead, memory, and operational complexity. |
Worker threads are not an automatic speed switch. A worker can help isolate CPU work, but transferring data and managing the pool has a cost. For sustained expensive computation, Node.js may not be the best fit. Compare complete workload behavior rather than assuming more workers mean higher throughput.
3. Make HTTP servers resilient
HTTP reliability includes connection handling and resource limits, not just route logic. Configure timeouts and socket limits for the service and its clients. These options have different roles: headersTimeout limits the time allowed to receive request headers, requestTimeout limits receipt of the full request, timeout controls socket inactivity, and keepAliveTimeout controls how long an idle keep-alive connection remains open. Choose values based on expected client behavior, request sizes, upstream limits, and the proxy in front of the app.
Here is a runnable minimal server using Node’s built-in HTTP module. The timeout values are examples, not universal production defaults; align them with your service’s traffic and proxy configuration.
// server.mjs
import http from 'node:http';

const server = http.createServer((req, res) => {
  if (req.method !== 'GET' || req.url !== '/health') {
    res.writeHead(404, { 'content-type': 'application/json' });
    res.end(JSON.stringify({ error: 'not_found' }));
    return;
  }
  res.writeHead(200, { 'content-type': 'application/json' });
  res.end(JSON.stringify({ ok: true }));
});

server.headersTimeout = 10_000;
server.requestTimeout = 30_000;
server.timeout = 35_000;
server.keepAliveTimeout = 5_000;
server.maxConnections = 1_000;

server.on('clientError', (err, socket) => {
  // A malformed or failing client connection should not crash the process.
  if (socket.destroyed) return;
  if (err.code === 'ECONNRESET' || !socket.writable) {
    socket.destroy();
    return;
  }
  socket.end('HTTP/1.1 400 Bad Request\r\nConnection: close\r\n\r\n');
});

server.listen(3000, '0.0.0.0', () => {
  console.log('Listening on port 3000');
});

server.on('error', (err) => {
  console.error('Server error', err);
  process.exitCode = 1;
});
For a framework server, configure the underlying HTTP server through the framework’s documented API and verify which timeout it sets itself. Avoid blindly copying example values: too-short limits reject legitimate slow clients, while too-long limits allow connections to consume resources longer.
Use a reverse proxy when it fits
A properly configured reverse proxy can provide load balancing, caching, connection filtering, and request limits. Ensure its timeout and body-size policies agree with the application. Review slow, fragmented request handling as a resource-exhaustion risk described in the Node.js security guidance. Application-level validation remains necessary; a proxy does not make unsafe request-body handling safe.
4. Treat security as application work
The Node.js security guide covers HTTP denial of service, malicious third-party modules, prototype pollution, sensitive information exposure, request smuggling, and unsafe inspector exposure. Keep the Inspector protocol off in production and limit who can reach operational endpoints. Review dependencies deliberately, including their event-loop behavior and maintenance posture. Security Best Practices
Use permissions with the correct threat model
The stable Permission Model can restrict process access to resources such as filesystem operations, network access, child processes, workers, and addons. Its audit mode can help discover permissions the application needs before enforcement. Node.js describes this as a seat belt for trusted code; it is not a security boundary against malicious code. Use it as one layer alongside operating-system, container, deployment, and application controls. See the Permission Model documentation.
5. Test the behavior that keeps the service reliable
Node’s built-in node:test module is stable and suitable for tests that fit your stack. A third-party framework may be a better fit where its ecosystem, fixtures, mocking, or reporting match existing requirements. There is no universally best runner for every application. See Node.js test runner documentation.
This small built-in test is runnable without an added test dependency:
// sum.test.mjs
import test from 'node:test';
import assert from 'node:assert/strict';

function sum(values) {
  return values.reduce((total, value) => total + value, 0);
}

test('sum returns the total for a bounded list', () => {
  assert.equal(sum([2, 3, 5]), 10);
});

test('sum handles an empty list', () => {
  assert.equal(sum([]), 0);
});
node --testBuild tests around failure behavior as well as the happy path: invalid and oversized inputs, downstream timeouts, retry limits, malformed connections where practical, and graceful shutdown. Keep unit tests fast; use integration tests to verify database, proxy, and runtime interactions that unit tests cannot establish. The Node.js learning hub includes material on testing, mocking, and coverage: Node.js Learn.
6. Make production problems diagnosable
Capture enough operational context to distinguish slow dependencies, event-loop pressure, memory growth, and connection failures. Track request latency distributions, error rates, resource use, and dependency timing using the observability stack appropriate to your deployment. Avoid logging secrets, authorization headers, or full sensitive request bodies.
Node’s diagnostic reports provide a built-in snapshot with JavaScript and native stack traces, heap statistics, platform details, and resource usage. They can be triggered programmatically or for configured uncaught exceptions, fatal errors, and signals. For example:
node --report-uncaught-exception --report-on-signal server.mjsReview report contents and storage permissions before collecting or sharing them: operational data may be sensitive. See Diagnostic report documentation.
Respond systematically to incidents
- Establish scope: one route, one dependency, one deployment, or all traffic.
- Compare latency and errors against dependency timing, event-loop symptoms, memory, and open connections.
- Reduce load or disable a failing optional path if that prevents cascading failure.
- Preserve relevant logs and diagnostic reports with secrets protected.
- After recovery, reproduce the failure with a focused test and adjust limits, capacity, or dependency behavior.
7. Capture browser output from Node.js when needed
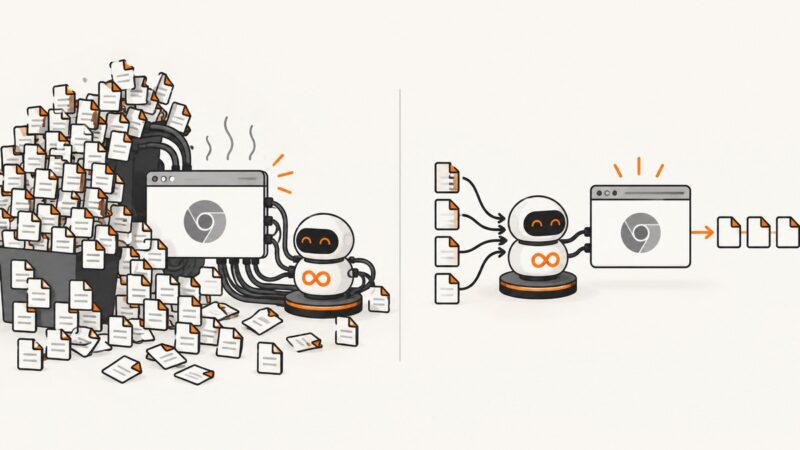
Some Node.js services also create website previews, audit snapshots, or PDFs. A browser-based capture path adds its own concerns: browser startup and memory, waiting for page readiness, navigation failures, lazy-loaded content, and consent overlays. Keep capture work out of latency-sensitive request handlers unless it has strict concurrency limits and an appropriate queue. For reliable jobs, bound the queue, set an overall deadline, record the target URL and outcome, and distinguish navigation failure from a successful capture.
Do-it-yourself browser automation gives control over browser lifecycle and page behavior, but it means maintaining the browser dependency and its deployment requirements. Use the browser library already present in your application and follow its official installation instructions; do not assume all libraries have identical launch or wait APIs.
8. Or skip the browser setup
For a Node.js service that needs a screenshot or PDF, ScreenshotNeo provides a website screenshot API and MCP server. A single GET request can return an image or PDF; see the API documentation. Before capture, it accepts consent banners like a visitor and removes more than 60 known consent platforms, newsletter popups, and chat widgets. Those steps can be turned off. Bot checks, blank pages, timeouts, failed loads, and cache hits cost nothing, and responses identify the page verdict and billing state in headers. Its MCP server provides take_screenshot, get_page_info, and capture_pdf for AI agents.
const q = new URLSearchParams({ access_key: 'YOUR_API_KEY', url: 'https://stripe.com' });
const res = await fetch(`https://api.screenshotneo.com/v1/shot?${q}`);
if (!res.ok) throw new Error(`Screenshot request failed: ${res.status}`);
await Bun.write('shot.webp', res);
The example uses Bun’s file writer. In Node.js, use this fully runnable version instead:
// capture.mjs — Node.js 18+
import { writeFile } from 'node:fs/promises';

const q = new URLSearchParams({
  access_key: 'YOUR_API_KEY',
  url: 'https://stripe.com'
});
const res = await fetch(`https://api.screenshotneo.com/v1/shot?${q}`);
if (!res.ok) throw new Error(`Screenshot request failed: ${res.status}`);
await writeFile('shot.webp', Buffer.from(await res.arrayBuffer()));
Equivalent command-line and Python calls:
curl -G "https://api.screenshotneo.com/v1/shot" -d access_key=YOUR_API_KEY --data-urlencode url=https://stripe.com -o shot.webpimport requests
r = requests.get("https://api.screenshotneo.com/v1/shot", params={"access_key": "YOUR_API_KEY", "url": "https://stripe.com"}, timeout=90)
open("shot.webp", "wb").write(r.content)ScreenshotNeo has 1,000 screenshots per month free with no card; paid plans start at $5 for 3,000 shots. Every feature is on every plan. Learn about ScreenshotNeo, then sign up for 1,000 free screenshots a month with no card.
Common reliability problems and fixes
| Symptom | Likely cause | Fix |
|---|---|---|
| Latency spikes under traffic | Long synchronous callback, CPU-heavy parsing, or unbounded concurrency. | Profile the slow path, cap input and fan-out, then partition or offload CPU work if measurement supports it. |
| Memory rises during bursts | Queues, batches, request bodies, or result sets grow without limits. | Set size and concurrency caps; apply backpressure and inspect heap evidence. |
| Connections linger or clients hang | Timeouts are absent or inconsistent across app and proxy. | Configure headers, request, socket, and keep-alive limits as appropriate, then align proxy settings. |
| Process exits on malformed connections | Socket errors are not handled at the server boundary. | Handle client/socket errors and close only the affected connection where possible. |
| Permission errors after enabling the model | The process lacks a needed filesystem, network, child-process, worker, or addon permission. | Use audit mode to discover required access, then grant the minimum needed and retest deployment behavior. |
| Diagnostic report exposes operational details | Reports include runtime, heap, and resource information. | Restrict report access and retention; review sensitive fields before sharing. |
Frequently asked questions
Is Node.js a good choice for every backend?
No. It is well suited to I/O-bound services. Sustained expensive computation may fit a dedicated worker service or another runtime better; decide from measured workload and operational needs.
Should every Node.js service use worker threads?
No. Use them when CPU work is substantial enough to justify scheduling, serialization, memory, and operational costs. They are not a general fix for slow I/O or unbounded queues.
Does the Permission Model sandbox untrusted modules?
No. It is intended to reduce accidental access by trusted code and does not protect against malicious code.
Which test runner should a team pick?
Choose the built-in runner or a third-party framework based on existing tooling, test requirements, and team workflow. The Node.js documentation does not designate one runner as best for all apps.
Practical release checklist
- Runtime is on an Active LTS or Maintenance LTS line, verified against the current schedule.
- Request bodies, batches, queues, and concurrency are bounded.
- Hot-path dependencies and parsing behavior have been reviewed for blocking work.
- HTTP timeouts, socket limits, proxy behavior, and error handling are configured together.
- Tests cover invalid input and important failure paths, not only successful requests.
- Operational signals and diagnostic report handling are defined, with sensitive data protected.
- Permission Model use matches its trusted-code threat boundary.