Why Puppeteer Dynamic Pages Work Locally but Fail on Heroku
Puppeteer works locally because your machine supplies Chrome and Linux dependencies. Fix Heroku browser, cache, sandbox, readiness, and memory issues with this guide.

Puppeteer usually works on a laptop because the laptop already has a browser, shared Linux libraries, fonts, writable cache directories, and a browser sandbox. A Heroku dyno is a minimal, headless Linux environment. If Chrome is absent, its libraries are missing, or Puppeteer cannot read its cache, the launch can fail before your code reaches page.goto(). If launch succeeds, dynamic content can still be empty when the script reads the DOM before the application finishes fetching and hydrating.
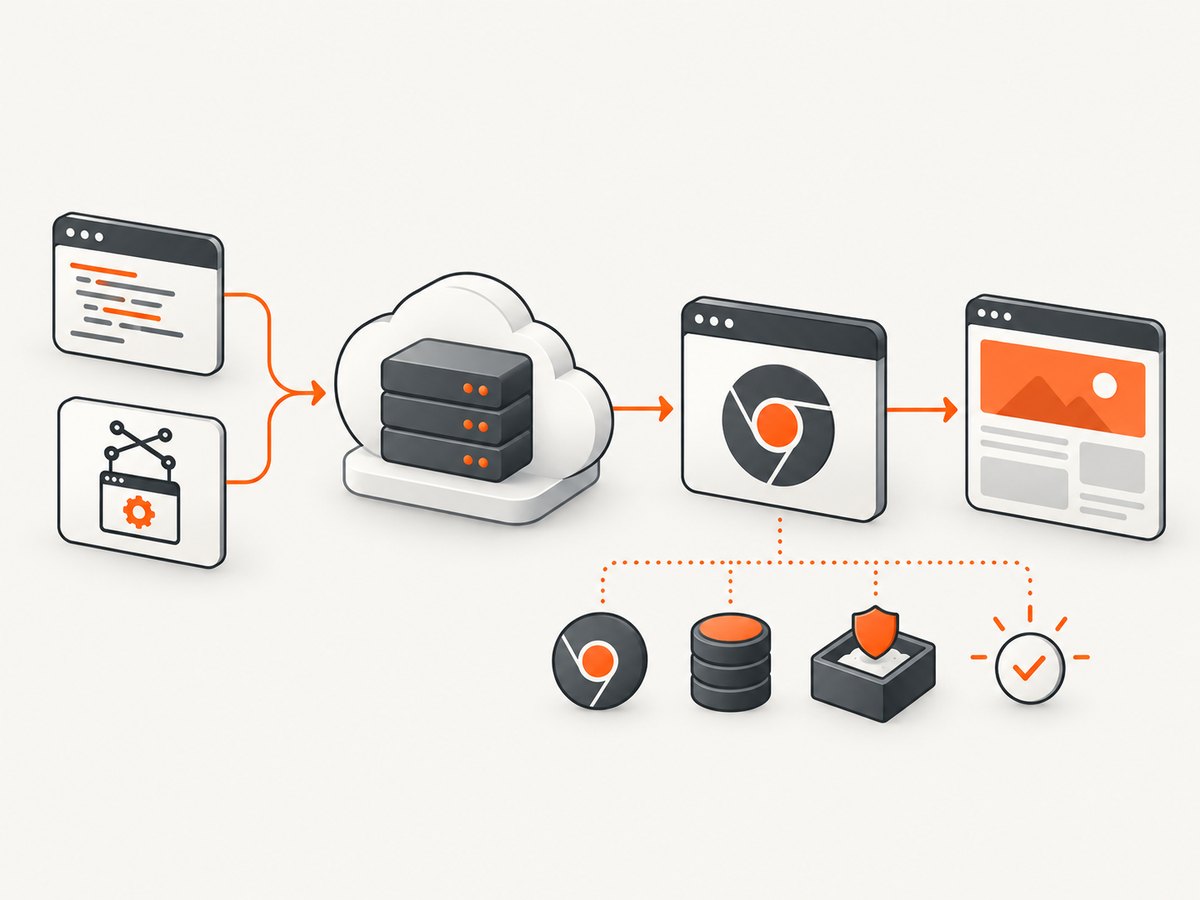
The reliable fix is to treat the dyno as a new machine: install a supported Chrome build during the build, verify Puppeteer resolves that executable, run headless with an appropriate sandbox configuration, wait for an application readiness signal, and watch memory, process, and timeout limits. Puppeteer’s own troubleshooting guide explains that Heroku needs dependencies that are not included in the Linux image by default. Read the Puppeteer Heroku guidance before choosing a buildpack.
1. What changes between local development and a Heroku dyno?
| Area | Local machine | Heroku dyno | Typical symptom |
|---|---|---|---|
| Browser binary | Chrome may already be installed, or Puppeteer downloaded one | No system Chrome unless your build installs it | Could not find expected browser locally |
| Native libraries | Desktop packages, fonts and codecs are present | Minimal slug with only declared build dependencies | Launch error naming a missing .so library |
| Display | A GUI session may exist | Headless only | Headful launch fails or hangs |
| Cache | ~/.cache/puppeteer persists between runs |
Only files included in the slug or writable runtime storage persist | Browser found during build but not at runtime |
| Sandbox | Your user may allow Chrome’s sandbox | Dyno restrictions can prevent sandbox startup | Chrome exits with a sandbox error |
| Timing | Low local latency and warm services | Cold starts and network latency vary | Empty client-rendered DOM or navigation timeout |
| Resources | More memory, processes and shared memory | Dyno limits are fixed by plan and process type | Random crashes, killed browser, or slow captures |
Puppeteer v19 and later place downloaded browsers in ~/.cache/puppeteer. A deployment that does not preserve that directory, or that runs as a different user, can lose access to the browser. The maintained Heroku Puppeteer buildpack documents the same failure mode for the newer cache path. See the buildpack’s cache notes.
2. Install Chrome during the Heroku build
Use one browser installation strategy consistently. Mixing an old Chromium buildpack, a Puppeteer-downloaded revision, and a manually set executable path makes version diagnosis harder.
Option A: Heroku Chrome for Testing buildpack
Heroku maintains a Chrome for Testing buildpack that installs Chrome during slug compilation. Add it alongside your language buildpack. The exact order depends on your app’s existing buildpacks; inspect it first:
heroku buildpacks -a YOUR_APP
heroku buildpacks:add --index 1 https://github.com/heroku/heroku-buildpack-chrome-for-testing.git -a YOUR_APP
Deploy, then inspect the build log for the Chrome installation path. Do not assume a path copied from an older article; log the path exposed by the buildpack or use Puppeteer’s resolved executable.
Option B: Community Puppeteer buildpack
The Puppeteer project links to a community buildpack for Heroku. Add it in the Heroku dashboard under Settings → Buildpacks, or with the CLI:
heroku buildpacks:add https://github.com/jontewks/puppeteer-heroku-buildpack -a YOUR_APPFollow that repository’s current instructions for cache configuration and supported Node versions. Buildpacks are part of your deployment, so pin or review changes when upgrading the app.
Keep the browser cache available
For a browser downloaded by Puppeteer, make the cache location explicit and verify it in the build and runtime environments. A common pattern is to set PUPPETEER_CACHE_DIR in Heroku config and ensure the directory is included in the slug or populated during the build:
heroku config:set PUPPETEER_CACHE_DIR=/app/.cache/puppeteer -a YOUR_APP
heroku config:set PUPPETEER_SKIP_DOWNLOAD=false -a YOUR_APP
Only use PUPPETEER_SKIP_DOWNLOAD=true when a buildpack supplies a compatible browser. Otherwise you are deliberately removing the browser that Puppeteer needs.
3. Use a dyno-compatible Puppeteer launcher
Start headless. A dyno has no display server, so headless: false is not a production setting unless you separately provide a virtual display.
import puppeteer from 'puppeteer';

const browser = await puppeteer.launch({
  headless: true,
  args: [
    '--no-sandbox',
    '--disable-setuid-sandbox',
    '--disable-dev-shm-usage'
  ]
});
The --no-sandbox flags are frequently required on restricted dynos. Puppeteer warns that running without a sandbox is strongly discouraged; configure a working sandbox when your runtime permits it. Review Puppeteer’s security warning and alternatives. If you must use these flags, isolate the browser process, keep dependencies current, and avoid loading untrusted pages with powerful credentials.
Log the resolved browser and versions
import puppeteer from 'puppeteer';

console.log({
  puppeteerVersion: puppeteer.version,
  executablePath: puppeteer.executablePath(),
  nodeVersion: process.version,
  cacheDir: process.env.PUPPETEER_CACHE_DIR || 'default'
});
If executablePath() points to a file that does not exist in the slug, fix the build before investigating page code. If it exists but exits immediately, compare the Puppeteer package version with the Chrome for Testing revision supplied by your buildpack.
4. Wait for dynamic content before reading it
A successful navigation means the initial document loaded; it does not mean a React, Vue, or Next.js page finished its API calls. Replace arbitrary short sleeps with a readiness condition that represents your application.

const page = await browser.newPage();
await page.goto('https://example.com/dashboard', {
  waitUntil: 'domcontentloaded',
  timeout: 60_000
});

await page.waitForSelector('[data-page-ready="true"]', {
  timeout: 30_000
});

const text = await page.locator('main').innerText();
console.log(text);
Useful alternatives include:
waitUntil: 'networkidle2'when the page has a finite burst of requests. Analytics, WebSockets, polling, and ads can prevent an idle state.page.waitForSelector()for a stable element that appears only after hydration.page.waitForFunction()for a JavaScript condition, such as a global readiness flag.- A bounded delay after the readiness signal for fonts or late image decoding.
await page.waitForFunction(() => window.__APP_READY__ === true, {
  timeout: 30_000
});
For pages you control, add a deterministic marker such as data-page-ready="true" after the final data request resolves. This is more reliable than guessing whether a local two-second delay will also work after a Heroku cold start.
5. A complete Heroku worker example
This worker captures a URL, waits for a selector, writes a file to the dyno’s temporary filesystem, and always closes the browser. Store durable output in object storage; dyno files are not a permanent database.
import puppeteer from 'puppeteer';

const target = process.env.TARGET_URL || 'https://example.com';
const readySelector = process.env.READY_SELECTOR || 'body';

const browser = await puppeteer.launch({
  headless: true,
  args: ['--no-sandbox', '--disable-setuid-sandbox', '--disable-dev-shm-usage']
});

try {
  const page = await browser.newPage();
  await page.setViewport({ width: 1365, height: 900, deviceScaleFactor: 1 });
  await page.goto(target, { waitUntil: 'domcontentloaded', timeout: 60_000 });
  await page.waitForSelector(readySelector, { timeout: 30_000 });
  await page.screenshot({ path: '/tmp/page.png', fullPage: true });
  console.log(`saved /tmp/page.png for ${target}`);
} finally {
  await browser.close();
}
A minimal package.json should pin a supported Puppeteer release and expose a start command:
{
  "type": "module",
  "scripts": { "start": "node worker.js" },
  "dependencies": { "puppeteer": "^24.0.0" }
}
Choose the version according to your current Node runtime and the browser supplied by your selected buildpack. The important operational check is that the browser revision Puppeteer expects is available at runtime.
6. Diagnose the common failures
| Error or symptom | Cause | Fix |
|---|---|---|
Could not find expected browser locally |
Download skipped, cache missing, or runtime user differs | Install Chrome with a buildpack, keep the cache in the slug, log executablePath(), and verify file permissions. |
cannot find chromium |
Buildpack did not run or its cache path is absent | Check buildpack order and build output; configure the current cache directory documented by the buildpack. |
Missing shared library such as libX11 |
Chrome dependencies are not in the slug | Use a maintained Chrome buildpack rather than installing random packages at runtime. |
| Sandbox error | Chrome cannot create its sandbox under dyno restrictions | Prefer a supported sandbox setup; if unavailable, use the documented --no-sandbox tradeoff and isolate the process. |
| Headful launch error | No graphical display on the dyno | Set headless: true; do not depend on X11. |
| Blank HTML but no launch error | DOM read occurred before hydration or API completion | Wait for a selector, readiness flag, or suitable network state. Log response status and browser console messages. |
| Navigation timeout | Slow origin, cold start, blocked request, or overly strict timeout | Set a bounded timeout, inspect failed requests, block unnecessary resources, and retry only idempotent work. |
| Browser killed or dyno restarts | Memory, process, or shared-memory pressure | Close every browser, page, and context; reduce concurrency; use --disable-dev-shm-usage; inspect Heroku logs and dyno metrics. |
| Works in build log, fails in runtime | Different environment variables, user, working directory, or filesystem | Print paths and permissions from the running process, not only from the build step. |
7. Make rendering reliable and affordable
Control concurrency
One Chromium process with multiple pages can use substantial memory. Start with one job per worker, measure, then increase concurrency gradually. Reuse a browser only when you can reset page state between jobs; otherwise launch per job and accept the startup cost. Always close pages in a finally block.
Reduce unnecessary work
Block analytics, video, ads, and other resources that are irrelevant to the capture. Keep CSS, fonts, and images required for the visual result. Set a maximum navigation time and a total job deadline so a stuck origin cannot occupy a worker indefinitely.
Retry safely
Retry transient DNS, connection-reset, and 5xx failures with exponential backoff and a small attempt limit. Do not blindly retry authentication failures, 4xx responses, or JavaScript errors. Include a job ID in logs so a retry can be distinguished from a duplicate capture.
Account for Heroku filesystem and limits
Use /tmp for short-lived screenshots and upload them before the process exits. Treat environment variables as configuration, not secrets in logs. Monitor memory and restart behavior; a browser crash can be a resource symptom rather than a page bug.
8. Or skip the browser setup
If your goal is a dependable website image rather than maintaining Chrome on a dyno, ScreenshotNeo provides a single HTTP request. Its cleanup step accepts cookie or consent banners and removes more than 60 known consent platforms, newsletter popups, and chat widgets before capture; each step can be disabled. Failed loads, bot checks or CAPTCHAs, blank pages, timeouts, and cache hits are not billed, and response headers identify the page verdict and billing result.
See the ScreenshotNeo API documentation for all options, including full-page capture, lazy-image loading, CSS-selector element capture, dark mode, device presets, custom viewport and retina scale, PDF output, custom CSS and JavaScript, clicks, waits, request blocking, headers, cookies, user agents, authorization, timezone, geolocation, transparent backgrounds, resizing, TTL caching, signed links, asynchronous jobs, webhooks, bulk capture, usage data, and the OpenAPI specification.
curl -G "https://api.screenshotneo.com/v1/shot" -d access_key=YOUR_API_KEY --data-urlencode url=https://stripe.com -o shot.webpimport requests
r = requests.get("https://api.screenshotneo.com/v1/shot", params={"access_key": "YOUR_API_KEY", "url": "https://stripe.com"}, timeout=90)
open("shot.webp", "wb").write(r.content)const q = new URLSearchParams({ access_key: 'YOUR_API_KEY', url: 'https://stripe.com' });
const res = await fetch(`https://api.screenshotneo.com/v1/shot?${q}`);ScreenshotNeo also has an MCP server with take_screenshot, get_page_info, and capture_pdf tools for Claude, Cursor, and other MCP clients. The free plan includes 1,000 screenshots a month with no card; paid plans start at $5 for 3,000 shots, and every feature is available on every plan. Create a free ScreenshotNeo account.
9. A deployment checklist
- Confirm the app’s Node and Puppeteer versions are supported together.
- Add one maintained Chrome buildpack and verify it appears in the build log.
- Confirm the browser cache and executable are present in the runtime slug.
- Log Puppeteer version, executable path, cache path, and Node version.
- Run headless and choose a documented sandbox configuration.
- Use a selector or application readiness flag for dynamic content.
- Set navigation and job deadlines; capture failed requests and console errors.
- Limit concurrency and close all browser resources.
- Write temporary files under
/tmpand upload durable output elsewhere. - Exercise a cold dyno and a deliberately slow page before production rollout.
10. FAQ
Does Heroku itself render JavaScript?
No. Heroku runs your process. Puppeteer and a compatible Chrome binary perform the rendering inside that process.
Can I use the Chrome installed on my laptop?
No. The dyno cannot access your laptop’s executable. Install a browser during the Heroku build or use a remote screenshot service.
Should I always use networkidle2?
No. Pages with polling, analytics, or WebSockets may never become idle. A page-specific readiness selector is usually clearer.
Why did changing the timeout not fix an empty page?
A timeout only changes how long Puppeteer waits. It does not prove that the app finished hydration. Wait for a condition that represents completed rendering.
Is --no-sandbox a performance option?
No. It changes Chrome’s isolation model to work around restricted environments. Prefer a functioning sandbox and treat the flag as a security tradeoff.
How can I avoid paying for failed screenshot attempts?
With a self-hosted worker, you absorb dyno and browser costs for every attempt. ScreenshotNeo identifies verdict and billing headers and does not bill failed loads, bot checks, blank pages, timeouts, or cache hits.