BlogScreenshots on your device
How to Screenshot Your Monitor Screen on Windows and Mac
Capture your full screen, a window, or a selected area on Windows and Mac, then save the image or copy it to the clipboard.

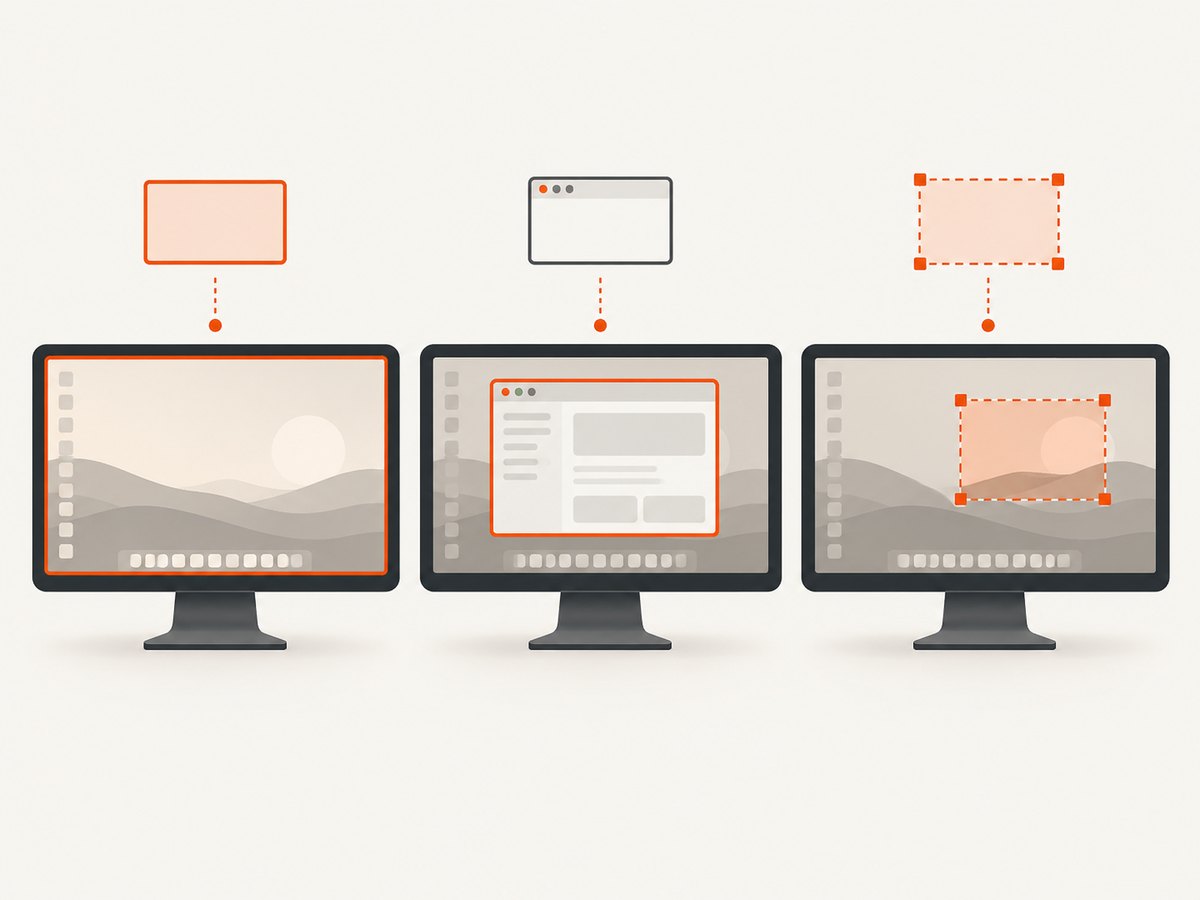
To screenshot a monitor on Windows, press Windows+Shift+S and select a capture mode, or press Windows+Print Screen to save the whole screen. To screenshot a Mac, press Shift+Command+3 for the full screen, Shift+Command+4 for a region, or Shift+Command+4, then Space, for a window. Windows captures can be copied or saved; Mac screenshots save to the desktop by default, with clipboard options available.
These built-in shortcuts are enough for ordinary desktop screenshots. This guide shows which one to use, where the result goes, how to capture menus and multiple displays, and what to check when a shortcut or save location behaves differently than expected.
1. Choose the capture you need
| Goal | Windows | Mac |
|---|---|---|
| Capture everything | Windows+Print Screen saves an image; Print Screen copies the full screen to the clipboard in the usual configuration. | Shift+Command+3 saves a screenshot. |
| Capture a region | Windows+Shift+S, then choose a snip mode and select the area. | Shift+Command+4, then drag. |
| Capture a window | Open the snipping overlay and choose Window snip, then select the window. | Shift+Command+4, press Space, then click the window. |
| Copy instead of saving | Use Print Screen or copy the capture from Snipping Tool. | Hold Control with the screenshot shortcut, such as Control+Shift+Command+3. |
On Windows, the Print Screen key may be labeled PrtSc or PrtScn. Some keyboards require holding Fn as well. Windows settings can also make Print Screen open the snipping overlay instead of copying a full-screen image, so use the shortcut that matches your desired result. [Microsoft: Snipping Tool] [Microsoft: Windows shortcuts]
2. Take screenshots on Windows
Capture a selected area, window, or full screen
- Press Windows+Shift+S.
- In the snipping toolbar, select the mode you need: rectangular, freeform, window, or full screen. The available controls can vary by Windows version.
- For a rectangular or freeform snip, drag around the area. For a window snip, point to and select the window. For full screen, select the full-screen option.
- The result is copied to the clipboard and can be opened in Snipping Tool. Use the app to annotate or crop it, then choose Save to create an image file.
Snipping Tool is included with Windows 10 and Windows 11. If the app opens but the snipping controls look different from these steps, follow the labels shown in your version. Microsoft documents the four still-image modes and the app’s editing and saving workflow. [Microsoft Support]
Capture the whole screen directly
Press Windows+Print Screen to save a full-screen capture in the Screenshots folder inside Pictures. If you only press Print Screen, the usual result is a full-screen image copied to the clipboard; paste it into an image editor, document, or message to use it. Because Print Screen can be configured to open screen snipping, check Windows settings if its behavior differs.
Save, edit, or paste the image
- Save a snip: Open its Snipping Tool notification or the app, then choose Save and a destination.
- Paste a clipboard capture: Open the destination app and press Ctrl+V. Clipboard captures are temporary; save them from an image app if you need a file.
- Find automatic saves: Check Pictures/Screenshots and Snipping Tool settings. Saving behavior and the selected folder can depend on the Windows version and app settings.
- Annotate or crop: Use Snipping Tool before saving if you need to mark up the image or trim its edges.
Capture a menu that closes quickly
If a menu disappears while you open the snipping controls, use Snipping Tool’s delay setting where available. Set a short delay, open the menu, and let the capture begin after the delay. This gives you time to put the screen into the state you want to document. It is useful for context menus and other transient interface elements.
3. Take screenshots on Mac
Capture the full screen
Press Shift+Command+3. The screenshot is saved to the desktop by default. If a thumbnail appears, click it to edit or wait for it to disappear and save. To put the screenshot on the clipboard instead, hold Control while using the shortcut.
Capture a selected region
- Press Shift+Command+4. The pointer becomes a crosshair.
- Drag to outline the area, then release to capture it.
- To cancel before capture, press Escape.
For precise framing, start at one corner and check the opposite edge before releasing. If you need to move the selection while dragging, use the on-screen selection controls available in your macOS version.
Capture a window or menu
- Open the window or menu you want to capture.
- Press Shift+Command+4, then press Space. The pointer changes to a camera.
- Click the target window or menu. Hold Option while clicking if you want to omit the window shadow.
Some apps restrict screenshots of their windows. Apple specifically notes that some protected content, including Apple TV content, may not be capturable. A shortcut cannot override an app’s restriction. [Apple: Take a screenshot on Mac]
Use the Screenshot utility and change the save destination
Press Shift+Command+5 to open the Screenshot utility. It provides controls for screen captures and additional capture options. Use its Options menu to choose a different save location. You can also Control-click a screenshot thumbnail and choose Save to Clipboard, or hold Control with a capture shortcut to copy directly. [Apple: Mac keyboard shortcuts]
4. Screenshots with more than one monitor
For a quick record of everything visible, use a full-screen shortcut. With multiple displays, inspect the result before sharing: the operating system and selected capture mode determine which display or area is included. If you need one monitor only, use a region selection or choose the relevant display/window in the capture controls, then confirm the saved image contains the intended content. Avoid assuming that a “full screen” capture means every connected monitor is combined into one image.
For a repeatable support report, note which display you captured and whether you used a window, region, or full-screen mode. This helps explain differences in resolution, visible notifications, or desktop arrangement when another person tries to reproduce the image.
5. Or skip the browser setup
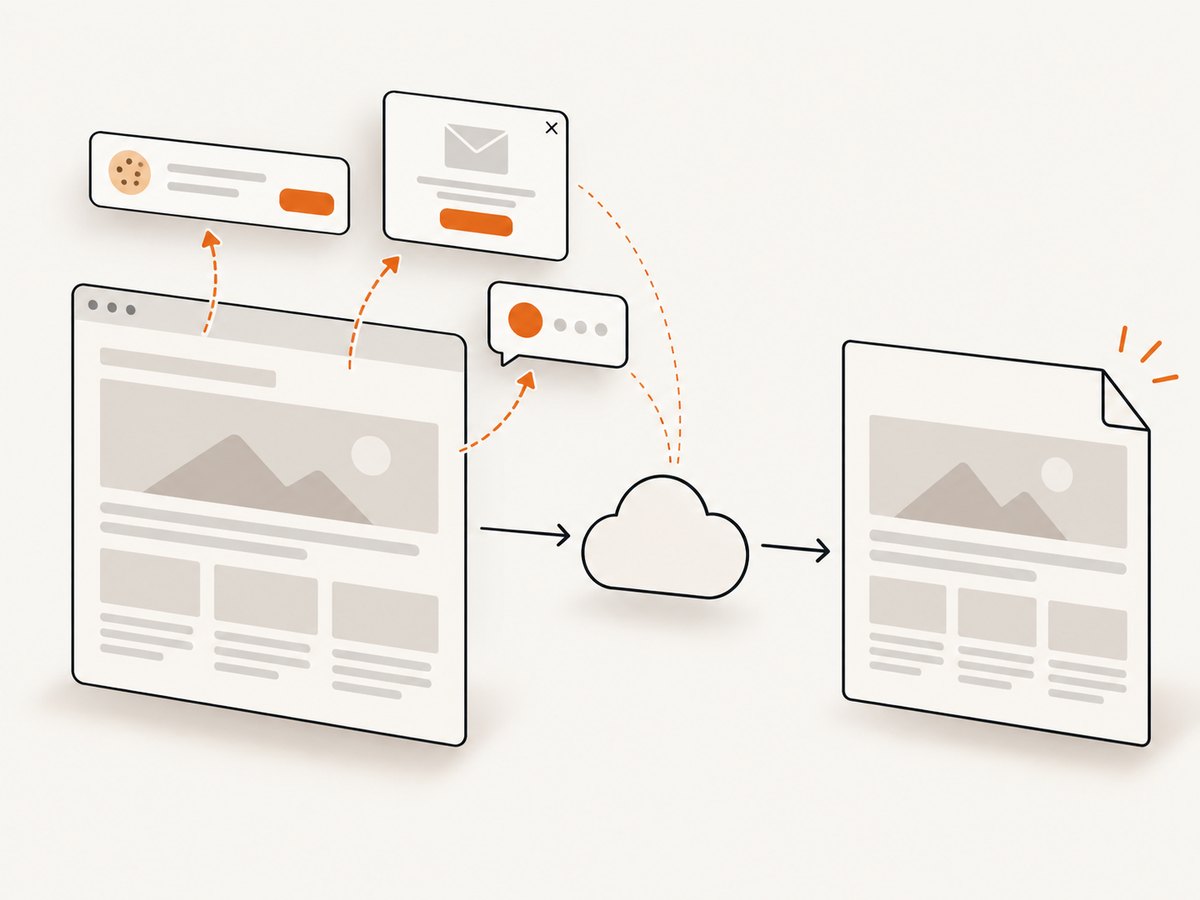
The shortcuts above capture the screen in front of you. If the actual task is capturing a website from code, ScreenshotNeo provides a one-request website screenshot API. See the API documentation for the available parameters.
curl -G "https://api.screenshotneo.com/v1/shot" -d access_key=YOUR_API_KEY --data-urlencode url=https://stripe.com -o shot.webpimport requests
r = requests.get("https://api.screenshotneo.com/v1/shot", params={"access_key": "YOUR_API_KEY", "url": "https://stripe.com"}, timeout=90)
open("shot.webp", "wb").write(r.content)const q = new URLSearchParams({ access_key: 'YOUR_API_KEY', url: 'https://stripe.com' });
const res = await fetch(`https://api.screenshotneo.com/v1/shot?${q}`);ScreenshotNeo removes cookie banners, newsletter popups, and chat widgets before the shot. Bot checks, blank pages, and failed loads are never billed. Its MCP server lets AI agents take screenshots, and the free plan includes 1,000 screenshots a month with no card; paid plans start at $5 for 3,000. Create a free account and get 1,000 screenshots a month with no card.
6. Troubleshooting
| Problem | Likely cause | What to do |
|---|---|---|
| Print Screen opens a selection overlay | Windows is configured to open screen snipping with that key. | Use Windows+Print Screen for a file, or change the relevant keyboard accessibility setting if you want the key to copy the full screen. |
| Nothing appears after a Windows snip | The capture may be on the clipboard, or the notification may have been dismissed. | Paste with Ctrl+V, open Snipping Tool, or check Pictures/Screenshots and its current save settings. |
| The Windows shortcut does not respond | A compact keyboard may require Fn; the key labels and function behavior vary. | Try the function-key combination indicated by your keyboard, or open Snipping Tool from the Start menu and capture there. |
| The Mac screenshot is missing from the desktop | The Screenshot utility may be set to save elsewhere, or the capture was copied to the clipboard. | Check Screenshot utility Options for the destination. Paste into an app if you used Control with the shortcut. |
| A Mac window screenshot omits the target | The app may restrict capture of protected content. | Check whether the app permits screenshots; protected video content may not be capturable. |
| A menu closes before it is captured | Opening the snipping interface changed focus and dismissed the menu. | On Windows, use Snipping Tool’s delay option where available. On Mac, open the menu first, then use the window/menu shortcut sequence. |
| The screenshot includes unwanted desktop details | The selected mode captured more than the intended area, or notifications were visible. | Use a region or window capture, close or hide unrelated windows, and review the result before sharing. |
7. Quality, reliability, and file handling
A screenshot records what is visible at capture time. Before taking it, close sensitive tabs, hide private notifications, and move unrelated windows if the image will be shared. Crop or annotate a copy when you need to point out a detail; keep an unedited original if the screenshot is evidence for a bug report or incident.
For repeatable captures, use the same display scaling, window size, and capture mode each time. A full-screen image includes more context but may be harder to read when pasted into a document; a region is smaller and focused but can omit useful surrounding context. Clipboard capture is convenient for quick pasting, while saving a file makes the result easier to name, archive, and attach later.
These built-in methods have no separate screenshot-tool charge. Storage, sharing, and any editing happen in the apps and services you choose. Windows save behavior may differ by version and settings; macOS defaults to the desktop unless its destination has been changed.
8. Quick checklist
- Choose full screen, region, or window before pressing a shortcut.
- Decide whether you want a file or a clipboard image.
- On Windows, use Snipping Tool for flexible modes and editing; check save settings if the file is not where expected.
- On Mac, use the Shift+Command shortcuts; add Control to copy, and check Screenshot utility Options for the destination.
- Review the capture for private information and confirm it shows the whole detail you need.
9. Frequently asked questions
What is the fastest way to screenshot on Windows?
Press Windows+Shift+S for the selection overlay. For a full-screen file, use Windows+Print Screen.
What is the Mac shortcut for a screenshot?
Shift+Command+3 captures the screen, while Shift+Command+4 lets you select an area. Add Space after the latter to target a window or menu.
How do I screenshot without saving a file?
Use a clipboard capture: Print Screen or a Snipping Tool copy workflow on Windows, or hold Control with a Mac screenshot shortcut.
Can I screenshot a protected video window?
Not always. Some apps prevent screenshots of protected content, so use the app’s permitted sharing or export options instead.
Do I need to install a screenshot app?
No. Windows Snipping Tool and macOS screenshot shortcuts handle the usual full-screen, window, and region captures without a separate screenshot app.


