How to Take Screenshots and Render HTML/CSS with AI Coding Assistants
Turn a screenshot into working HTML and CSS with an AI coding assistant, then render, compare, debug and refine the result in a repeatable browser loop.
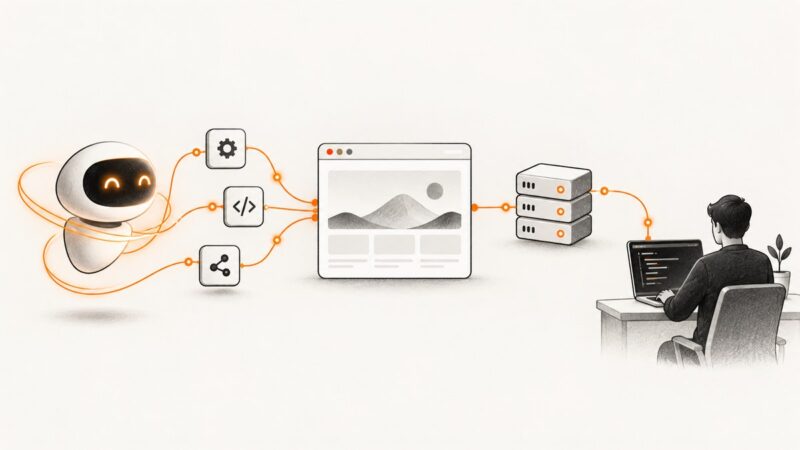
Direct answer: give an image-capable coding assistant the reference screenshot, your project context and explicit implementation constraints. Ask for a first HTML/CSS implementation, run it in a browser, capture the rendered result, compare visible differences, and iterate in small corrections. A screenshot is a starting reference; rendering and revision are required for reliable results.
1. The screenshot-to-code loop
The dependable workflow has five stages:
- Provide the reference. Attach a PNG, JPEG, WEBP, GIF, PDF or another format supported by the selected assistant and model. GitHub documents image attachments for Copilot Chat when the selected model accepts image input (GitHub Copilot documentation).
- Describe the target. State whether you want plain HTML/CSS, React, Vue or another framework; identify the page sections; specify responsive breakpoints, fonts, assets and interaction requirements.
- Implement a first pass. Ask the assistant to create or modify files in your project. The screenshot alone does not contain every semantic, responsive or interactive requirement.
- Render the actual page. Start the development server, open the route in a browser and capture the viewport sizes that matter.
- Compare and revise. Feed the assistant the rendered screenshot, the reference, selected element HTML/CSS and console errors. Request one focused correction at a time.
Visual Studio Code describes this feedback loop as a way for agents to edit, run, interact with, analyze screenshots and errors, and repeat fixes. Its documentation summarizes the purpose clearly: “Browser tools give agents a visual and interactive feedback loop for web development.” See VS Code browser tools.
2. Prepare the reference and project
Choose a useful screenshot
- Use the highest-resolution source available.
- Record the viewport width and height if known.
- Provide separate mobile and desktop references when the layout changes.
- Include the full page when section order matters, or crop a region when you need precise work on one component.
- Tell the assistant which parts are authoritative: spacing, typography, colors, imagery, layout or interactions.
Collect implementation context
Before prompting, identify:
- Framework and build command.
- Entry route and component files.
- Existing design tokens, CSS variables and utility classes.
- Available fonts, icons and image assets.
- Browser support and required breakpoints.
- Interactions visible in the reference, such as menus, tabs, hover states or forms.
3. A prompt that produces a useful first implementation
Attach the screenshot and use a prompt that separates observation from implementation:
You are implementing this page in plain HTML and CSS.

Reference:
- Use the attached screenshot as the visual reference.
- Target viewport: 1440px wide by 900px high.

Requirements:
- Create semantic HTML for header, navigation, main content, sections and footer.
- Use CSS variables for colors, spacing and typography.
- Make the layout responsive at 768px and 480px.
- Do not invent images or text when an existing project asset can be used.
- Preserve accessible headings, labels, keyboard focus and alt text.
- Keep the implementation in index.html and styles.css.

First, list the visual regions you inferred. Then write the files. Explain assumptions that cannot be determined from the screenshot.
For an existing application, add the relevant files to the prompt and constrain the edit:
Inspect src/pages/Home.tsx, src/styles/tokens.css and public/assets before changing anything.
Reproduce the attached reference in the existing React project.
Reuse existing components and tokens where possible. Change only the home page and its styles.
Do not replace the routing or build configuration.
4. Complete runnable HTML/CSS example
This minimal example gives an assistant a stable target to edit. Save it as index.html, open it in a browser, and compare the result with your reference.
<!doctype html>
<html lang="en">
<head>
  <meta charset="utf-8">
  <meta name="viewport" content="width=device-width, initial-scale=1">
  <title>Studio landing page</title>
  <link rel="stylesheet" href="styles.css">
</head>
<body>
  <header class="site-header">
    <a class="brand" href="#">Studio</a>
    <nav aria-label="Primary navigation">
      <a href="#work">Work</a>
      <a href="#about">About</a>
      <a href="#contact">Contact</a>
    </nav>
  </header>
  <main>
    <section class="hero" id="about">
      <p class="eyebrow">Independent digital studio</p>
      <h1>Interfaces that make complex products clear.</h1>
      <p class="lede">We design and build focused web experiences for teams shipping ambitious products.</p>
      <a class="button" href="#contact">Start a project</a>
    </section>
    <section class="work" id="work" aria-labelledby="work-title">
      <h2 id="work-title">Selected work</h2>
      <div class="cards">
        <article class="card"><div class="card-art" aria-hidden="true"></div><h3>Northstar</h3><p>Product strategy and interface design.</p></article>
        <article class="card"><div class="card-art card-art-alt" aria-hidden="true"></div><h3>Field Notes</h3><p>A publishing system for a research team.</p></article>
      </div>
    </section>
  </main>
  <footer id="contact">hello@example.com</footer>
</body>
</html>
:root {
--ink: #17201d;
--muted: #5d6964;
--paper: #f4f1e9;
--accent: #d9ff57;
--line: #c9cec5;
--space: clamp(1rem, 2vw, 2rem);
font-family: Inter, ui-sans-serif, system-ui, sans-serif;
}
* { box-sizing: border-box; }
body { margin: 0; color: var(--ink); background: var(--paper); }
a { color: inherit; }
.site-header { display: flex; justify-content: space-between; align-items: center; padding: 1.25rem var(--space); border-bottom: 1px solid var(--line); }
.brand { font-weight: 800; text-decoration: none; }
nav { display: flex; gap: 1rem; }
nav a { text-decoration: none; }
.hero { max-width: 70rem; margin: 0 auto; padding: clamp(5rem, 14vw, 12rem) var(--space); }
.eyebrow { color: var(--muted); text-transform: uppercase; letter-spacing: .12em; font-size: .75rem; }
h1 { max-width: 11ch; margin: .4rem 0 1.5rem; font-size: clamp(3rem, 9vw, 8rem); line-height: .9; letter-spacing: -.06em; }
.lede { max-width: 34rem; color: var(--muted); font-size: clamp(1.1rem, 2vw, 1.4rem); }
.button { display: inline-block; margin-top: 1rem; padding: .9rem 1.2rem; background: var(--accent); text-decoration: none; font-weight: 700; }
.work { max-width: 70rem; margin: 0 auto; padding: 0 var(--space) 6rem; }
.cards { display: grid; grid-template-columns: repeat(2, minmax(0, 1fr)); gap: 1rem; }
.card { border-top: 1px solid var(--line); padding-top: 1rem; }
.card-art { aspect-ratio: 4 / 3; background: #b7c6bd; }
.card-art-alt { background: #d6b4a5; }
.card p { color: var(--muted); }
footer { padding: 2rem var(--space); border-top: 1px solid var(--line); }
@media (max-width: 700px) {
.site-header { align-items: flex-start; gap: 1rem; }
nav { flex-wrap: wrap; justify-content: flex-end; }
.cards { grid-template-columns: 1fr; }
}
5. Render and inspect the page
- Install the project dependencies and run the documented development command, such as
npm run dev. - Open the exact route in a browser at the reference viewport size.
- Capture the rendered page at desktop and mobile widths.
- Check the browser console and network panel for errors, missing fonts, failed images and blocked requests.
- Select the element with the mismatch and copy its HTML and computed styles.
Browser-enabled assistants can use screenshots, selected element HTML/CSS and console output as context. Chrome DevTools for agents can connect compatible agents to a live Chrome session; access to authenticated pages should be deliberate because the agent can inspect content available in that session. OpenAI’s guidance also describes approval boundaries for developer-mode CDP access.
6. Ask for focused visual corrections
Broad prompts such as “make it match” produce ambiguous edits. Report observable differences and constrain the change:
Compare the current render with the reference at 1440x900.
Fix only the hero section:
1. The heading starts 42px too far right.
2. The heading is two lines in the reference but three lines now.
3. The button is 12px too low.
4. The background color should match the sampled warm off-white.
Do not change the card grid, copy or breakpoint rules. After editing, explain which selectors changed.
Repeat at one viewport before moving to another. Once desktop is close, test mobile separately; a desktop fix can create overflow or unusable tap targets on narrow screens.
7. Framework-specific guidance
React, Vue and similar component frameworks
- Ask the assistant to map visible regions to components before editing.
- Keep repeated content in data arrays and render it through one component.
- Preserve existing routing, state and data-fetching code.
- Use stable keys and semantic elements instead of adding unnecessary wrappers.
Utility CSS
Tell the assistant whether it may add arbitrary values or must use an existing token scale. Otherwise it may produce visually close but inconsistent spacing.
Existing design systems
Provide the token file and component documentation. Ask for a mapping from screenshot regions to existing primitives before requesting new CSS.
8. Browser automation and agent choices
| Route | Useful when | Check before adopting |
|---|---|---|
| GitHub Copilot Chat | You want image attachments and repository context inside GitHub-supported workflows. | Whether the selected model accepts images and what project context is included. |
| VS Code browser tools | You want an integrated loop for running the app, interacting, inspecting screenshots, selected elements and errors. | Browser coverage, console visibility and workspace permissions. |
| OpenAI Codex | You want an agent to inspect a browser-rendered result and iterate on implementation. | Client, plan and environment availability. |
| Chrome DevTools for agents | You need live inspection of a compatible Chrome session, including debugging tools. | Setup effort, access scope and whether the session contains sensitive data. |
Capabilities vary by product, model, plan, workspace and date. Verify current availability in the relevant documentation before standardizing a workflow.
9. Or skip the browser setup
If you need a clean screenshot for an AI coding loop, design review or regression check, ScreenshotNeo returns a PNG, JPEG, WebP or PDF from one GET request. The API accepts full-page captures, CSS-element captures, custom viewports, dark mode, retina scale, custom CSS and JavaScript, waits, request blocking, cookies, headers, user agents, timezones, geolocation, caching and asynchronous jobs. See the ScreenshotNeo API documentation for the complete option list.
curl -G "https://api.screenshotneo.com/v1/shot" -d access_key=YOUR_API_KEY --data-urlencode url=https://stripe.com -o shot.webpimport requests
r = requests.get("https://api.screenshotneo.com/v1/shot", params={"access_key": "YOUR_API_KEY", "url": "https://stripe.com"}, timeout=90)
open("shot.webp", "wb").write(r.content)const q = new URLSearchParams({ access_key: 'YOUR_API_KEY', url: 'https://stripe.com' });
const res = await fetch(`https://api.screenshotneo.com/v1/shot?${q}`);Cookie banners, newsletter popups and chat widgets are removed before capture. Bot checks, blank pages, failed loads and cache hits are not billed; response headers identify the page verdict and billing status. ScreenshotNeo also provides an MCP server with take_screenshot, get_page_info and capture_pdf for Claude, Cursor and other MCP clients. The free plan includes 1,000 screenshots per month with no card, and paid plans start at $5 for 3,000 shots.
Sign up for 1,000 free ScreenshotNeo screenshots a month with no card.
10. Troubleshooting
| Symptom | Likely cause | Fix |
|---|---|---|
| The assistant cannot read the image | The selected model or client does not support image input. | Choose an image-capable model or provide a hosted/file reference supported by that client. |
| Output looks plausible but does not match | The prompt lacks viewport, spacing or typography constraints. | Attach the rendered screenshot, state exact dimensions and report measurable differences. |
| Fonts look wrong | The font is unavailable, blocked or loaded after capture. | Confirm the font URL, wait for fonts, inspect network errors and provide the intended font files or fallback. |
| Mobile layout overflows | Desktop dimensions were copied without responsive rules. | Test at the target mobile width, inspect overflowing elements and add explicit breakpoint behavior. |
| Images are missing | Relative paths, build output or network requests differ in the browser environment. | Use correct asset paths, inspect the network panel and verify the production-like route. |
| Agent changes unrelated files | The request has no edit boundary. | Name allowed files and require a summary of every changed file. |
| Browser automation cannot inspect a page | Permission, login state or CDP setup is unavailable. | Use a permitted session, grant only the required access and provide a screenshot plus console output manually. |
| Screenshot API returns an error | Invalid URL, missing key, timeout or a page protected by a bot check. | Validate the URL and credentials, increase the wait strategy, inspect response headers and retry with a supported viewport or user agent. |
11. Performance, reliability and cost
- Reduce iteration time: ask for one component change per cycle and capture only the viewport or element under review when a full-page image is unnecessary.
- Keep comparisons stable: use fixed viewport dimensions, timezone, locale, data fixtures and font loading conditions.
- Handle asynchronous pages: wait for a selector, a delay or network idle before judging the result. Lazy-loaded images may require a full-page capture or an explicit scroll strategy.
- Cache deterministic captures: use a chosen TTL when the page and parameters are unchanged. Cache hits in ScreenshotNeo are not billed.
- Use bulk or async capture for scale: ScreenshotNeo supports up to 100 URLs per bulk call and signed webhooks for asynchronous jobs.
- Budget for clean results: ScreenshotNeo bills only clean shots. Bot checks, blank pages, timeouts, failed loads and cache hits do not consume a billed shot, and
X-Page-VerdictandX-Billedreport the result. - Protect credentials: keep API keys server-side, avoid putting secrets in client-side URLs and remove sensitive cookies before sharing captures with an assistant.
12. A repeatable review checklist
- Reference image and target viewport are documented.
- Semantic structure and heading order are correct.
- Typography, line height and wrapping match at target widths.
- Spacing, alignment, borders, shadows and colors have been compared in the browser.
- Images, fonts and icons load without console or network errors.
- Keyboard focus, labels, alt text and contrast are acceptable.
- Responsive behavior is checked at desktop, tablet and mobile widths.
- Interactive states are tested, not inferred from a static image.
- Authenticated or sensitive browser sessions were not exposed unnecessarily.
- Final screenshots are captured from the built or deployment-like environment.
13. FAQ
Can one screenshot generate production-ready code?
It can generate a useful first implementation, but the image does not specify hidden states, semantics, responsive rules, data behavior or exact assets. Plan for browser inspection and revision.
Should I send the whole repository to the assistant?
Provide the smallest relevant set of files first: route, components, styles, tokens and assets. Add more context when a dependency or shared component is involved.
How many screenshots should I provide?
Use one reference per important viewport or state. A desktop image cannot reliably define a mobile layout or an open menu state.
Is a browser agent required?
No. You can run the page yourself and attach screenshots, HTML/CSS and console output. Browser tools reduce manual copying when their permissions and environment fit your project.
How do I capture a page for an AI agent without installing browser automation?
Use ScreenshotNeo’s API or MCP server. It can capture a page, clean common overlays and return an image or PDF for the next coding iteration.