How to Use the Google Play Console MCP Server
Set up the community Google Play Console MCP server, connect Play Console permissions, verify access, and safely automate releases, reviews, subscriptions, and reports.

Direct answer: The phrase “Google Play Console MCP server” does not identify one official Google implementation. This guide covers the community google-play-developer-mcp project described in its README. It exposes tools for the Android Publisher API v3 and Play Developer Reporting API v1beta1. You install its npm package, configure it in an MCP client, authorize a Google Cloud service account in Play Console, register the account with the server, and verify access with auth_status and apps_list.
The project README reports 150 tools across 30 groups (a maintainer-published figure for 2026). Treat package availability, tool names, permissions, and supported clients as changeable details. Inspect the tool schemas in your MCP client before using a workflow.
What this MCP server does
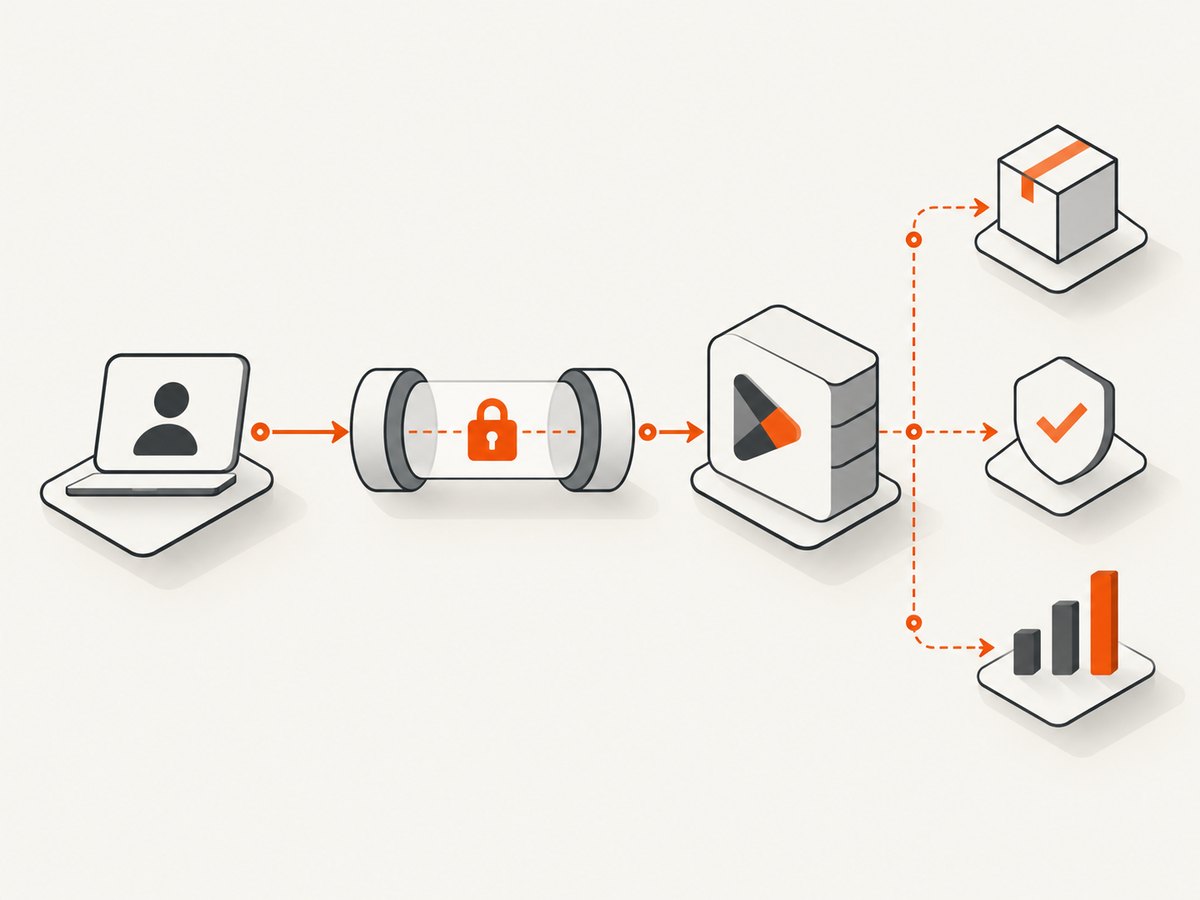
The documented implementation groups tools around common Play Console work:
- Android app edits, bundles, tracks, releases, and staged rollouts
- User reviews and replies
- Subscriptions and offers
- Crash-rate and error reports through Play Developer Reporting
- Account and application discovery
An MCP server exposes capabilities to an AI application. The client discovers those capabilities with the protocol’s tools/list method, then supplies arguments that match each tool’s schema. The Play Console project’s resource/action names and arguments belong to that implementation; do not assume another MCP server has the same interface.
Requirements and security checklist
- An MCP-compatible client such as Claude Desktop, Claude Code, Cursor, VS Code, or another supported client.
- Node.js and npm, with permission to install the package globally.
- A Google Cloud project.
- The Google Play Android Developer API enabled in that project.
- The Play Developer Reporting API enabled in that project.
- A Google Cloud service account and JSON key.
- The service-account email invited in Play Console with only the permissions needed for your tasks.
Keep the JSON key outside your repository, restrict its filesystem permissions, and never paste it into an AI conversation or commit it to source control. The project’s account registry stores the key-file path, so protect the path and the file. Google’s general MCP guidance also recommends granting only the resource permissions required by the intended tools. A Google MCP tool-user role does not replace Android Publisher or Play Console permissions for this project.
Install the community server
- Install the package:
npm install -g google-play-developer-mcpConfirm that the executable is available:
google-play-developer-mcp --helpIf your shell cannot find the command, check npm’s global binary directory and add it to PATH. Do not put credentials in the command line or shell history.
Enable Google APIs and create credentials
- Open the Google Cloud project that will own the integration.
- Enable the Google Play Android Developer API.
- Enable the Play Developer Reporting API.
- Create a service account.
- Create a JSON key for that service account and save it in a protected location outside the code repository.
- Copy the service account’s email address; you will grant that identity access in Play Console.
API enablement and Play Console authorization are separate steps. Completing one does not grant the other.
Authorize the service account in Play Console
- In Play Console, open the users and permissions area for your developer account.
- Invite the service-account email address.
- Grant the narrowest permissions that cover the workflows you plan to run.
- For read-only automation, avoid release, edit, subscription, or reply permissions.
- For release automation, verify that the account can edit the intended application and track before attempting a commit.
The project README warns that authorization can take up to 24 hours to propagate. During that window, an otherwise correct setup can return PERMISSION_DENIED. Still check the identity, enabled APIs, package name, and assigned permissions instead of assuming every permission error is propagation delay.
Configure an MCP client
Add a server entry whose command is google-play-developer-mcp. The exact JSON wrapper differs by client, but the command and arguments are the important parts. A representative configuration is:
{
  "mcpServers": {
    "google-play-developer": {
      "command": "google-play-developer-mcp"
    }
  }
}
Use the client’s documented configuration file and restart the client after saving it. Do not add the service-account JSON contents to this file unless the version of the project explicitly requires that; the README’s approach registers a key-file path through a tool.
Register and verify an account
After the client starts the server, use the project’s account-registration tool. The README calls it accounts_add. Inspect its schema and provide the path to the protected service-account JSON key.
accounts_add({
  "name": "production",
  "credentials_path": "/secure/google/play/production-service-account.json"
})
Then run the documented checks:
auth_status({ "account": "production" })
apps_list({ "account": "production" })
A successful check should show an authenticated account and the applications visible to that identity. If the app you expect is missing, stop before any write operation and fix Play Console access or the selected account.
Run common read workflows
List visible apps
apps_list({ "account": "production" })Inspect tool schemas
Ask your MCP client to list the server tools or use its tool inspector. Look for the exact package-name, track, version-code, date-range, and pagination fields before composing a call. The implementation’s names follow a resource/action pattern, but schemas can change between releases.
Reviews
Use the review-listing tool exposed by your installed version, then pass the review identifier and reply text to its reply tool. Keep replies human-reviewed and avoid sending private customer data to the model.
Crash and error reports
Use the reporting tools with an explicit application identifier and time range. Store the returned data with the query window so later comparisons use the same period and filters.
Release workflow: inspect every write before committing
The README demonstrates opening an edit, uploading an Android App Bundle, updating a track, and committing the edit. A safe sequence is:
- Confirm the account and package name.
- Open an edit.
- Upload the intended
.aab. - Read back the uploaded version code.
- Update the intended track.
- Review release status, version code, user fraction, and notes.
- Commit only after a human confirms those values.
// Pseudocode: use the schemas exposed by your installed server.
edit = edits_insert({ account: "production", package_name: "com.example.app" })
upload = bundles_upload({
  account: "production",
  package_name: "com.example.app",
  edit_id: edit.id,
  bundle_path: "/builds/app-release.aab"
})
track = tracks_update({
  account: "production",
  package_name: "com.example.app",
  edit_id: edit.id,
  track: "beta",
  version_codes: [upload.version_code],
  rollout_fraction: 0.1
})
// Review all returned fields, then commit:
edits_commit({ account: "production", package_name: "com.example.app", edit_id: edit.id })
The names and argument shapes above illustrate the documented sequence; use your client’s live schemas. A commit has real publishing consequences. Never let an agent infer the package name, track, rollout fraction, or version code from ambiguous text.
Promote a beta release to staged production
The README also demonstrates promotion from beta to a staged production rollout. Before committing, verify that the source version is the one you intend, the production track is correct, and the rollout fraction matches your release plan. Keep promotion as a separate, explicitly approved action rather than allowing a general “publish this build” prompt.
Multiple accounts and environments
Use separate registered account names for development, staging, and production. Give each service account access only to the applications and actions required in that environment. Before every write, print or inspect the selected account and package name in the client transcript. This prevents a valid credential from publishing to the wrong application.
Troubleshooting
| Symptom | Likely cause | Fix |
|---|---|---|
command not found |
Global npm bin directory is not on PATH. |
Find npm’s global bin directory, add it to PATH, and restart the MCP client. |
| Client shows no tools | Wrong command, invalid client JSON, or server failed during startup. | Run google-play-developer-mcp --help, validate the client configuration, and inspect the client’s MCP startup log. |
PERMISSION_DENIED |
Service account is not invited, lacks a required Play Console permission, APIs are disabled, or access has not propagated. | Check the exact service-account email, enable both APIs, review Play Console permissions, and allow up to 24 hours for propagation. |
| Authentication works but no apps appear | The account can authenticate but cannot see the selected developer account or application. | Run apps_list, verify the Play Console invitation and application access, and confirm the registered account name. |
| Upload fails | Invalid or inaccessible bundle path, wrong package, or an edit mismatch. | Use an absolute readable .aab path, confirm its package identity, and upload it inside the current edit. |
| Commit is rejected | Track, version code, rollout, listing, or edit state is invalid. | Read the complete error, inspect the edit contents, and correct the specific field before retrying. Do not blindly repeat a commit. |
| Reports are empty | Wrong date range, package, metric, or reporting data is not available yet. | Check the tool schema, use an explicit range, confirm the package, and distinguish “no data” from an authorization error. |
Reliability, performance, and cost considerations
- Read before write: Separate discovery and validation calls from mutations. Cache app and track identifiers only when you can detect stale values.
- Idempotency: Record edit IDs, uploaded version codes, and commit results. If a network error occurs after a commit request, inspect the edit and track before retrying.
- Propagation: Permission changes may take up to 24 hours, so provision access before a release window.
- Least privilege: Narrow permissions reduce the impact of a leaked key and make authorization failures easier to diagnose.
- Credential rotation: Follow your organization’s key rotation policy and update the registered path deliberately.
- Cost: The dossier does not establish pricing, quotas, latency, uptime, or productivity benchmarks for this community project. Check current Google API terms and your client’s resource usage before operating at scale.
Or skip the browser setup
If your immediate need is dependable website screenshots for release notes, QA evidence, or documentation, ScreenshotNeo provides a single screenshot API request. It accepts the cookie or consent banner before capture and removes more than 60 known consent platforms, newsletter popups, and chat widgets. Bot checks, blank pages, timeouts, failed loads, and cache hits are not billed, and each response reports the result in X-Page-Verdict and X-Billed headers. It also provides an MCP server with take_screenshot, get_page_info, and capture_pdf tools for Claude, Cursor, and other MCP clients.
See the ScreenshotNeo API documentation for all options. A direct call looks like this:
curl -G "https://api.screenshotneo.com/v1/shot" -d access_key=YOUR_API_KEY --data-urlencode url=https://stripe.com -o shot.webpimport requests
r = requests.get("https://api.screenshotneo.com/v1/shot", params={"access_key": "YOUR_API_KEY", "url": "https://stripe.com"}, timeout=90)
open("shot.webp", "wb").write(r.content)const q = new URLSearchParams({ access_key: 'YOUR_API_KEY', url: 'https://stripe.com' });
const res = await fetch(`https://api.screenshotneo.com/v1/shot?${q}`);Every feature is included on every plan. The free plan includes 1,000 screenshots each month with no card; paid plans start at $5 for 3,000. Create a free ScreenshotNeo account.
FAQ
Is this an official Google Play Console MCP server?
No. This article covers the community google-play-developer-mcp implementation described in its project README. Google’s general MCP documentation does not make that project official.
Do I need both Google Cloud and Play Console permissions?
Yes. You must enable the APIs in Google Cloud and authorize the service-account identity in Play Console. They solve different parts of access.
Can the server publish an app automatically?
The documented tools include release write operations, including edits, bundle uploads, track updates, and commits. Use explicit approvals and verify every publishing field before committing.
Why should I run apps_list first?
It confirms which applications the selected account can see. That catches account and permission mistakes before a release or subscription mutation.
Where should the service-account JSON key live?
Store it in protected storage outside source control, restrict access, and follow your organization’s rotation and secret-management rules.