Why Visual Testing Works Well with Agile Development
Visual checks fit agile because teams can compare each increment’s rendered UI with an accepted reference, review changes, and keep improving the feature within the sprint.
Visual testing fits agile development because it gives teams a way to check the rendered interface as they build and revise a feature. Capture an accepted reference for an important page, component, or state; compare later renders against it; and review differences while the work is still in progress. The comparison identifies visual changes, but a person or team still needs to decide whether each change is intended.
Agile work is delivered and tested in increments, with testing integrated into ongoing development. A visual check extends that feedback loop to what users see. It is one quality signal alongside functional tests, accessibility evaluation, and manual review; the available guidance does not establish a specific percentage improvement in delivery speed or defect reduction. Scaled Agile’s testing guidance and Microsoft Learn’s overview of agile development describe the iterative context.
1. How does visual testing fit into an agile sprint?
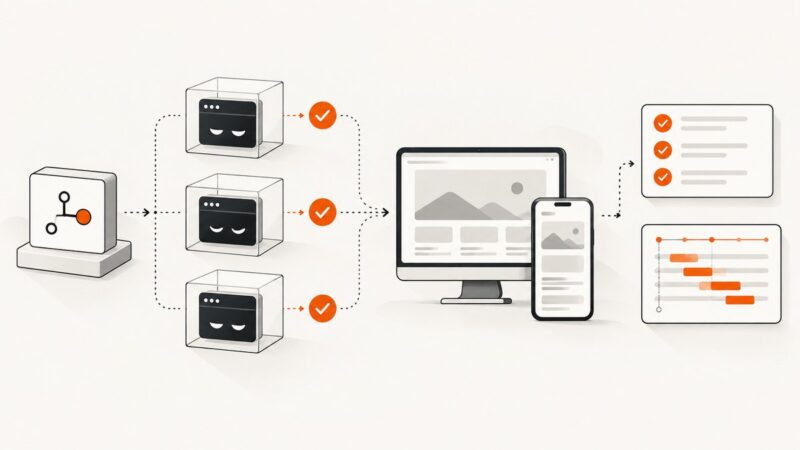
Visual testing can be added at the points where a team already clarifies, builds, integrates, and reviews a feature:
- Choose testable visual states during refinement. Identify the page or component, its important state, and the viewport that matter. Include a clear acceptance criterion for intended appearance where useful.
- Establish an accepted reference. Capture the current approved appearance in a known browser and environment. Store the baseline where the team can review and maintain it.
- Run comparisons as the UI changes. Put the check in the developer workflow or CI after relevant changes, rather than waiting for a large end-of-release review.
- Review the difference in context. Decide whether it is an intended design change, an unintended regression, or rendering noise. Fix unintended changes; accept a new reference only after review confirms the new appearance is correct.
- Keep other quality checks in the sprint. Verify behavior and accessibility separately, then remediate issues as part of the work.
This gives developers and reviewers concrete feedback while the feature is being built. The benefit is a workflow fit: the team sees visual changes near the code change that introduced them. It should not be presented as a measured guarantee of faster delivery or fewer escaped defects.
2. What visual testing checks—and what it cannot prove
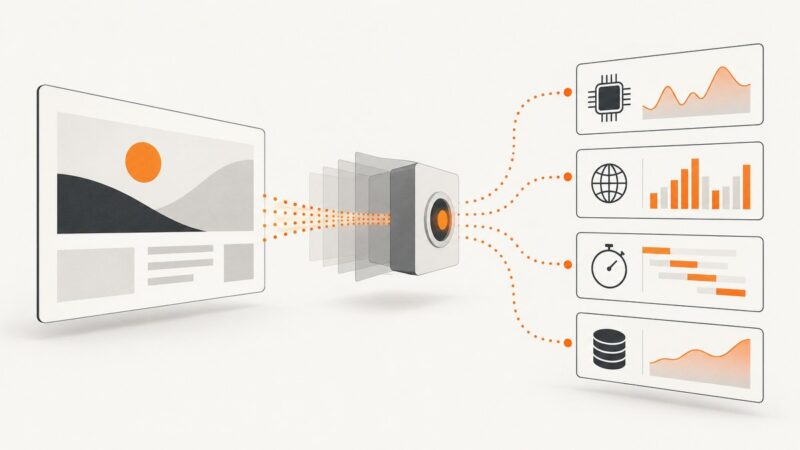
A visual regression check compares a new screenshot with an accepted reference image. It can reveal changes in layout, typography, color, spacing, imagery, and other rendered details that a behavior assertion may not describe.
A difference does not automatically mean a bug. A planned redesign should create differences; content changes, timestamps, animations, and remote assets can also create noise. Visual comparison does not by itself establish that a button works, a form validates correctly, or a page is accessible. Treat the diff as evidence for review, not a verdict about quality.
3. A practical Playwright setup
Playwright Test’s visual comparison uses toHaveScreenshot(). On the first run it creates a reference image; later runs compare new screenshots with that baseline. The following TypeScript example is a small runnable setup for a page-level check.
Install and create the test
npm init -y
npm install --save-dev @playwright/test
npx playwright install chromium
Create tests/landing.spec.ts:
import { test, expect } from '@playwright/test';

test('landing page matches its accepted appearance', async ({ page }) => {
  await page.setViewportSize({ width: 1280, height: 800 });
  await page.goto('http://127.0.0.1:4173/', { waitUntil: 'networkidle' });
  await expect(page.getByRole('heading', { name: 'Product overview' })).toBeVisible();
  await expect(page).toHaveScreenshot('landing.png', {
    fullPage: true,
    animations: 'disabled',
    maxDiffPixels: 100,
  });
});
Replace the local URL and heading with values from your application. Start the application on that address in a separate terminal, then run:
npx playwright test tests/landing.spec.tsThe initial run reports that the baseline does not exist and writes the actual screenshot. Review that image, then commit the generated tests/landing.spec.ts-snapshots/ directory alongside the test. On subsequent runs, Playwright compares against the committed reference. To intentionally regenerate references after reviewing a design change, run:
npx playwright test tests/landing.spec.ts --update-snapshotsDo not use snapshot updates as a way to make a failing check green without examining the diff. Playwright’s documentation explains baseline generation, updating, and environment consistency.
Make the result repeatable
The operating system, browser version, settings, hardware, and headless mode can affect rendered pixels. Generate and check references in the same environment—commonly the same CI image and pinned browser installation. If you compare across browser or platform projects, maintain the corresponding references for each environment rather than assuming one image is universal.
Control the sources of accidental variation where possible: use stable fixture data, deterministic dates, fixed viewport sizes, and predictable fonts and assets. Disable animations for comparison if motion is not the feature under test. If a small region is inherently volatile, isolate it deliberately instead of broadly loosening the comparison threshold.
4. Choose useful coverage and comparison settings
Start with a compact set of high-value states that are repeatable and likely to catch meaningful changes. Expand coverage when the maintenance cost is clear.
| Decision | Practical starting point | Trade-off |
|---|---|---|
| Page or component | Use page screenshots for important journeys and Storybook stories for reusable components. | Pages provide context but may be noisier; component stories are focused but do not cover the full page composition. |
| Responsive coverage | Choose representative desktop and mobile widths tied to acceptance criteria. | More viewports increase coverage and runtime, and may need separate baselines. |
| Browser and operating system | Match the production-relevant environments your team supports. | Different rendering engines and platforms can need distinct references and review. |
| Baseline policy | Store references with code or in a review system that preserves history and ownership. | Local snapshots make changes visible in version control; hosted workflows can centralize review but add a service and its setup. |
| Difference tolerance | Start strict, then add a narrow tolerance only for understood rendering variation. | A broad threshold can hide small but important changes. |
Playwright exposes comparison options such as maxDiffPixels and stylePath; the latter can apply a stylesheet during capture to suppress volatile elements. Use suppression narrowly and document why the ignored area is not part of the check. Storybook documents a separate route using visual tests for stories and a Chromatic-backed CI workflow. These are implementation examples, not a universal ranking. Compare approaches by deployment model, page versus component coverage, supported browsers, baseline storage, pull request review, CI integration, controls for dynamic content, and ongoing triage effort. See the Storybook visual testing guide.
5. Keep visual checks alongside accessibility and behavior tests
A screenshot can show that a page looks different; it cannot prove that the interface is usable with a keyboard or assistive technology. Nor does a matching screenshot prove that the underlying interactions work. Pair visual checks with functional assertions and accessibility evaluation.
Section508.gov’s agile sprint guidance recommends incorporating accessibility requirements into backlog items and acceptance criteria, using automated and manual checks during development, remediating issues in the sprint, and integrating automated accessibility checks into CI. Use manual evaluation where automation cannot establish whether the requirement is met.
6. Where ScreenshotNeo fits
Visual regression tests need a repeatable capture and a baseline comparison. For pages that your team needs to capture without setting up and maintaining a browser capture script, ScreenshotNeo is a website screenshot API and MCP server. One GET request returns a PNG, JPEG, WebP, or PDF. Its API can be useful for capture workflows, while your team still owns deciding which images are accepted baselines and reviewing differences.
Or skip the browser setup
Send one request to capture a page. The examples use Stripe as the target; replace it with a URL you are authorized to capture. See the ScreenshotNeo API documentation for the request details.
curl -G "https://api.screenshotneo.com/v1/shot" \
  -d access_key=YOUR_API_KEY \
  --data-urlencode url=https://stripe.com \
  -o shot.webp
import requests
r = requests.get(
"https://api.screenshotneo.com/v1/shot",
params={"access_key": "YOUR_API_KEY", "url": "https://stripe.com"},
timeout=90,
)
r.raise_for_status()
open("shot.webp", "wb").write(r.content)const q = new URLSearchParams({ access_key: 'YOUR_API_KEY', url: 'https://stripe.com' });
const res = await fetch(`https://api.screenshotneo.com/v1/shot?${q}`);
if (!res.ok) throw new Error(`Screenshot request failed: ${res.status}`);
await Bun.write('shot.webp', res);ScreenshotNeo accepts cookie or consent banners like a visitor and removes more than 60 known consent platforms, newsletter popups, and chat widgets before capture; each step can be turned off. Bot checks and CAPTCHAs, blank pages, timeouts, failed loads, and cache hits cost nothing, and response headers identify the page verdict and billing status. An MCP server provides take_screenshot, get_page_info, and capture_pdf tools for AI agents. The free plan includes 1,000 screenshots per month with no card; paid plans start at $5 for 3,000 screenshots. See the docs for API and MCP details, then sign up for 1,000 free screenshots a month with no card.
7. Troubleshooting visual checks
| Symptom | Likely cause | What to do |
|---|---|---|
| First run fails because a snapshot is missing | No accepted reference exists yet. | Inspect the generated actual image, confirm it is the intended state, then commit the baseline directory. |
| Images differ on a developer machine and CI | Different operating system, browser version, fonts, hardware, or headless configuration. | Generate and compare in the same controlled environment; pin the browser and run baseline updates there. |
| Diff changes on every run | Dynamic timestamps, animations, randomized data, remote content, or unstable layout. | Use fixed data and time, disable irrelevant motion, wait for a meaningful readiness condition, and narrowly mask or hide only the volatile region. |
| Screenshot is blank or incomplete | The page has not reached its required state, an asset is still loading, or the test navigated to the wrong route. | Assert a page landmark is visible, wait for the application-specific ready state, and verify the URL and server are correct. |
| Many changed pixels after a harmless update | Font, browser, CSS, or viewport changed and affected broad rendering. | Check the environment and inspect the diff before adjusting tolerance; update references only if the change is intentional. |
| Baseline update makes CI pass but reviewers cannot tell why | Snapshot files were refreshed without a clear review trail. | Include baseline changes in the same pull request as the UI change and describe the intended appearance change. |
| Visual test passes while the feature is broken | Pixel comparison does not exercise behavior or accessibility requirements. | Add functional assertions, accessibility checks, and manual checks for requirements that need human evaluation. |
8. Performance, reliability, and cost
Each capture adds browser rendering work, and testing additional pages, states, viewports, and browser projects adds work too. Keep the suite focused on representative, high-value views; avoid capturing redundant states; and run the checks in the same CI stage where their feedback is useful. Component-level stories can help target changes, while page-level checks cover integrated layouts.
Reliability depends on controlling the rendering environment and reducing nondeterministic inputs. A flaky screenshot check consumes review time and can teach a team to ignore diffs, so fix unstable sources before expanding coverage. Do not hide substantial portions of the page just to silence noise.
Cost depends on the chosen workflow. A self-managed browser test uses engineering time and CI resources; a hosted visual review workflow adds its provider’s terms and pricing, which should be checked directly. The research sources do not support a universal tool cost comparison. For ScreenshotNeo capture specifically, the supplied plans are Free: 1,000 shots/month; Starter: $5 for 3,000; Growth: $15 for 15,000; Pro: $39 for 60,000; Scale: $99 for 250,000; and Business: $249 for 1,000,000. Yearly billing gives two months free, and every feature is on every plan. These API capture prices do not replace the work of defining and reviewing visual baselines.
9. Frequently asked questions
Should visual testing happen before or after a feature is finished?
Start when the expected appearance is clear enough to capture, then keep checking relevant changes through the sprint. Early checks make the comparison part of implementation and review.
Should every page and state have a screenshot test?
No. Begin with repeatable, high-value states where a visual regression would matter. Expand based on risk and the maintenance cost of the checks.
Can a visual test replace design review?
No. It shows rendered differences against a reference; people still determine whether those differences match the intended design.
Where can I read more about agile testing standards?
ISO lists ISO/IEC TR 29119-6:2021, guidance for using the ISO/IEC/IEEE 29119 series in agile projects. It is further reading, not a prerequisite for implementing visual regression checks.