How to Write Sample Code for an MCP Server
Build a complete MCP server in Python or TypeScript, run it locally, inspect it with MCP Inspector, and test its tools before deployment.
Short answer: start with one deterministic tool, define its input schema, expose it over stdio, and test the complete server with MCP Inspector. Python is a concise first example; TypeScript is a strong choice when your application already runs on Node.js. MCP servers can expose tools, resources, and prompts, and the official SDKs support stdio, Streamable HTTP, and legacy HTTP+SSE transports.
This guide gives you complete files you can copy, local run commands, Inspector steps, client tests, transport guidance, troubleshooting, and a path to add a ScreenshotNeo-powered screenshot tool.
What an MCP server contains
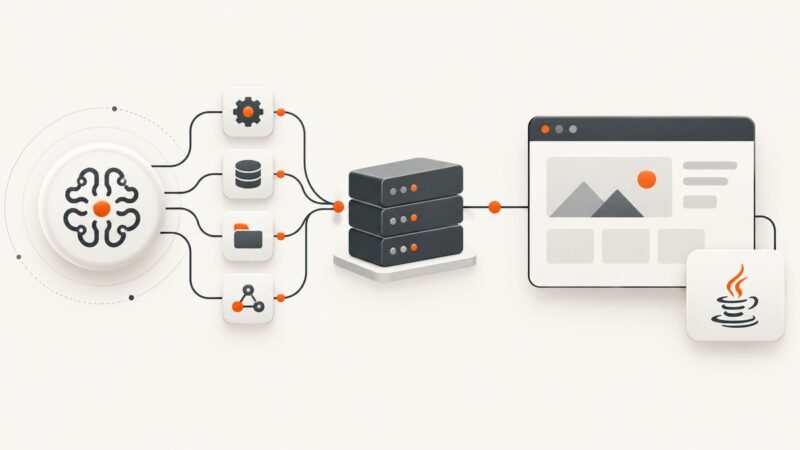
The Model Context Protocol standardizes how an application provides context to an LLM. The server surface has three primitives:
| Primitive | Use it for | Example |
|---|---|---|
| Tool | An action the model can call | Calculate a sum, query a service, capture a screenshot |
| Resource | Readable context identified by a URI | Expose a configuration document or generated report |
| Prompt | A reusable prompt template | Ask an agent to review a page against a checklist |
A useful sample is a complete runnable file rather than an isolated handler fragment. The official Python getting-started guide describes its code blocks as complete, working files: Python SDK getting started.
Choose Python or TypeScript
| Concern | Python | TypeScript |
|---|---|---|
| Runtime | Python 3.10 or newer | Node.js with a TypeScript toolchain |
| Install | uv add "mcp[cli]" or pip install "mcp[cli]" |
npm install @modelcontextprotocol/sdk zod |
| Schema style | Type hints and SDK validation | Zod input and output schemas |
| Best first transport | stdio | stdio |
| Local development | uv run mcp dev server.py |
Run the compiled or development entry point |
| Testing | In-memory Client(mcp) test |
SDK client example or an MCP client |
Build a minimal Python MCP server
1. Create the project
mkdir sample-mcp-python
cd sample-mcp-python
python --version
python -m venv .venv
source .venv/bin/activate
pip install "mcp[cli]"
Python 3.10 or newer is required by the official SDK. With uv, the equivalent setup is:
uv init
uv add "mcp[cli]"
2. Save a complete server file
Create server.py:
from mcp.server.fastmcp import FastMCP

mcp = FastMCP("Sample Calculator")

@mcp.tool()
def add(a: int, b: int) -> int:
    """Add two integers and return the result."""
    return a + b

@mcp.resource("config://sample")
def sample_config() -> str:
    """Return a small read-only configuration document."""
    return "mode=development\noperation=addition\n"

@mcp.prompt()
def explain_addition(a: int, b: int) -> str:
    """Create a prompt that asks an agent to explain an addition."""
    return f"Explain how to calculate {a} + {b}, then give the result."

if __name__ == "__main__":
    mcp.run()
The add function is a deterministic tool with explicit integer inputs. The resource and prompt are optional, but show all three MCP primitives in one small server.
3. Run it over stdio
python server.py
stdio is intended for local integrations where the MCP client starts your server as a child process. Do not print logs to standard output: stdout carries the protocol messages. Send diagnostics to stderr or a file.
4. Open it in MCP Inspector
The Python SDK documents this development command:
uv run mcp dev server.py
Open the Inspector URL printed by the command. Connect to the server, list its tools, call add with 2 and 3, read config://sample, and inspect the prompt result. Inspector is useful because it shows the declared schemas and the protocol response separately from your application code.
Test the Python server without a subprocess
The SDK supports an in-memory test. This checks your registration and return value without opening a port or starting another process.
import asyncio
from mcp import ClientSession
from mcp.client.in_memory import create_connected_server_and_client_session

from server import mcp

async def main() -> None:
    async with create_connected_server_and_client_session(mcp) as session:
        result = await session.call_tool("add", {"a": 1, "b": 2})
        assert result.structuredContent == {"result": 3}

if __name__ == "__main__":
    asyncio.run(main())
The exact helper names can vary with SDK releases, so keep the test aligned with the version installed in your environment. The documented testing path uses an in-memory client: no subprocess, port, or transport is involved.
Build the same server in TypeScript
1. Install the SDK
mkdir sample-mcp-typescript
cd sample-mcp-typescript
npm init -y
npm install @modelcontextprotocol/sdk zod
npm install -D typescript tsx @types/node
2. Create the server
Save this as src/index.ts:
import { McpServer } from "@modelcontextprotocol/sdk/server/mcp.js";
import { StdioServerTransport } from "@modelcontextprotocol/sdk/server/stdio.js";
import { z } from "zod";

const server = new McpServer({
  name: "sample-calculator",
  version: "1.0.0",
});

server.registerTool(
  "add",
  {
    title: "Add numbers",
    description: "Add two integers and return the result.",
    inputSchema: {
      a: z.number().int(),
      b: z.number().int(),
    },
    outputSchema: {
      result: z.number().int(),
    },
  },
  async ({ a, b }) => {
    const result = a + b;
    return {
      content: [{ type: "text", text: String(result) }],
      structuredContent: { result },
    };
  },
);

const transport = new StdioServerTransport();
await server.connect(transport);
The TypeScript SDK pattern registers a name, title, description, input schema, and output schema, then returns text content plus structured content. The stdio connection uses StdioServerTransport and server.connect(transport).
3. Run it
npx tsx src/index.ts
For a production build, compile TypeScript and run the generated JavaScript entry point. Keep protocol output on stdout and send logs to stderr.
Use Streamable HTTP when the server is remote
Use stdio when the client can launch the server locally. Use Streamable HTTP when clients need to reach a server over a network. The TypeScript documentation describes older HTTP+SSE support as a backwards-compatibility option.
| Transport | Connection model | Typical use |
|---|---|---|
| stdio | Client spawns a local process | Desktop assistants, local development |
| Streamable HTTP | Client connects to an HTTP endpoint | Remote services and shared deployments |
| HTTP+SSE | Older HTTP streaming pattern | Clients that still require legacy compatibility |
Move to HTTP after the local server works. At that point, decide how you will handle authentication, authorization, request limits, logging, timeouts, and session or state management. The minimal sample intentionally leaves those deployment controls out.
Add a screenshot tool with ScreenshotNeo
If your MCP server needs visual context, a tool can call a screenshot API and return the resulting image or a link. ScreenshotNeo is a website screenshot API and MCP server for developers. It removes cookie and consent banners, newsletter popups, and chat widgets before capture. Bot checks, blank pages, timeouts, failed loads, and cache hits are not billed, and the response reports the page verdict and billing status in X-Page-Verdict and X-Billed headers.
Its MCP server provides take_screenshot, get_page_info, and capture_pdf tools for Claude, Cursor, and other MCP clients. See the ScreenshotNeo documentation for the current parameter list and setup details.
Direct API examples
curl -G "https://api.screenshotneo.com/v1/shot" -d access_key=YOUR_API_KEY --data-urlencode url=https://stripe.com -o shot.webp
import requests

r = requests.get(
    "https://api.screenshotneo.com/v1/shot",
    params={"access_key": "YOUR_API_KEY", "url": "https://stripe.com"},
    timeout=90,
)
r.raise_for_status()
open("shot.webp", "wb").write(r.content)
const q = new URLSearchParams({ access_key: 'YOUR_API_KEY', url: 'https://stripe.com' });
const res = await fetch(`https://api.screenshotneo.com/v1/shot?${q}`);
if (!res.ok) throw new Error(`Screenshot failed: ${res.status}`);
const bytes = new Uint8Array(await res.arrayBuffer());
// Save bytes with your application's file or object-storage API.
ScreenshotNeo supports full-page captures with lazy images loaded, CSS-selector element capture, dark mode, device presets and custom viewports, retina scale, PDF output, custom CSS and JavaScript, clicks, selector or network-idle waits, request blocking, headers, cookies, user agents, authorization, timezone, geolocation, transparent backgrounds, resizing, chosen cache TTLs, signed image links, asynchronous jobs with signed webhooks, bulk capture of up to 100 URLs per call, usage reporting, and an OpenAPI specification.
Or skip the browser setup
Instead of maintaining Playwright or Chromium setup inside your MCP server, expose ScreenshotNeo’s capture operation as a tool or use its MCP server:
curl -G "https://api.screenshotneo.com/v1/shot" -d access_key=YOUR_API_KEY --data-urlencode url=https://stripe.com -o shot.webp
Cookie banners, popups, and chat widgets are removed before the shot. Bot checks, blank pages, and failed loads are never billed. The MCP server lets AI agents take screenshots. The free plan includes 1,000 screenshots each month with no card, and paid plans start at $5 for 3,000 screenshots.
Create a free ScreenshotNeo account.
Design the tool contract carefully
- Use narrow inputs: require a URL, selector, or other value the tool actually needs.
- Describe side effects: tell the model whether the operation reads data, changes data, or incurs an external API call.
- Return structured content: include machine-readable fields alongside human-readable text.
- Validate at the boundary: reject malformed URLs, impossible ranges, and missing credentials before making a network request.
- Set timeouts: a tool should fail clearly instead of waiting forever.
- Keep secrets server-side: never ask the model to supply an API key as a normal tool argument.
Troubleshooting
| Symptom | Likely cause | Fix |
|---|---|---|
| Inspector cannot connect | The server exited immediately or wrote logs to stdout | Run the file directly, check stderr, and move logs away from stdout. |
ModuleNotFoundError: mcp |
The virtual environment is not active | Activate it or run through the environment manager that installed the SDK. |
| Tool is missing in Inspector | Registration code did not execute | Check imports, decorators or registration calls, and restart the server. |
| Schema validation fails | Input types do not match the declared schema | Send integers as numbers, required fields, and values within your documented limits. |
| TypeScript import errors | Module settings or SDK version mismatch | Use the module settings required by your installed SDK and follow its current examples. |
| Screenshot response is not an image | The request failed or returned an error response | Check HTTP status, inspect X-Page-Verdict and X-Billed, and save the body only after a successful response. |
| Remote calls hang | No timeout or network-idle condition is too strict | Set a finite timeout and choose a wait condition appropriate for the page. |
| Works locally but not remotely | Transport, authentication, or proxy configuration differs | Test the HTTP endpoint independently, then verify client transport and authorization settings. |
Performance, reliability, and cost notes
- Start with stdio and deterministic tools; every network dependency increases latency and failure modes.
- Use caching where the underlying data permits it. ScreenshotNeo lets you choose a cache TTL, and cache hits are not billed.
- Use asynchronous jobs and signed webhooks for long captures or batches rather than holding a client request open.
- For repeated visual checks, capture only the element you need instead of a full page.
- Set explicit waits for selectors, delays, or network idle when pages render content after the initial response.
- Keep tool output small. Return a URL, metadata, or a compact structured object rather than embedding unnecessary data.
- ScreenshotNeo pricing includes a free tier of 1,000 shots per month. Paid plans are Starter $5 for 3,000, Growth $15 for 15,000, Pro $39 for 60,000, Scale $99 for 250,000, and Business $249 for 1,000,000; yearly billing gives two months free.
Production checklist
- Pin and periodically update the SDK version.
- Give every tool a clear description and explicit schema.
- Test valid, invalid, empty, and boundary inputs.
- Send logs to stderr and redact credentials.
- Configure timeouts and cancellation for external calls.
- Choose stdio or Streamable HTTP based on where the client runs.
- Add authentication and authorization before exposing a remote server.
- Use Inspector for interactive checks and an automated client test for regressions.
- Record enough request metadata to diagnose failures without storing sensitive page data unnecessarily.
FAQ
Can one MCP server expose tools, resources, and prompts?
Yes. They are separate primitives, so a server can register any combination that fits its use case.
Is stdio suitable for a public API?
stdio is designed for a client that launches the server locally. A remotely reachable service generally uses Streamable HTTP.
Do I need TypeScript to use Zod?
No. Zod is used by the official TypeScript SDK examples. Python uses Python types and its SDK conventions instead.
How do I test without running a port?
Use the Python SDK’s in-memory client path, which connects directly to the server object.
What should a screenshot tool return?
Return a stable image or signed URL plus useful metadata such as the final URL, dimensions, verdict, and billing status. Keep credentials outside the model-visible arguments.